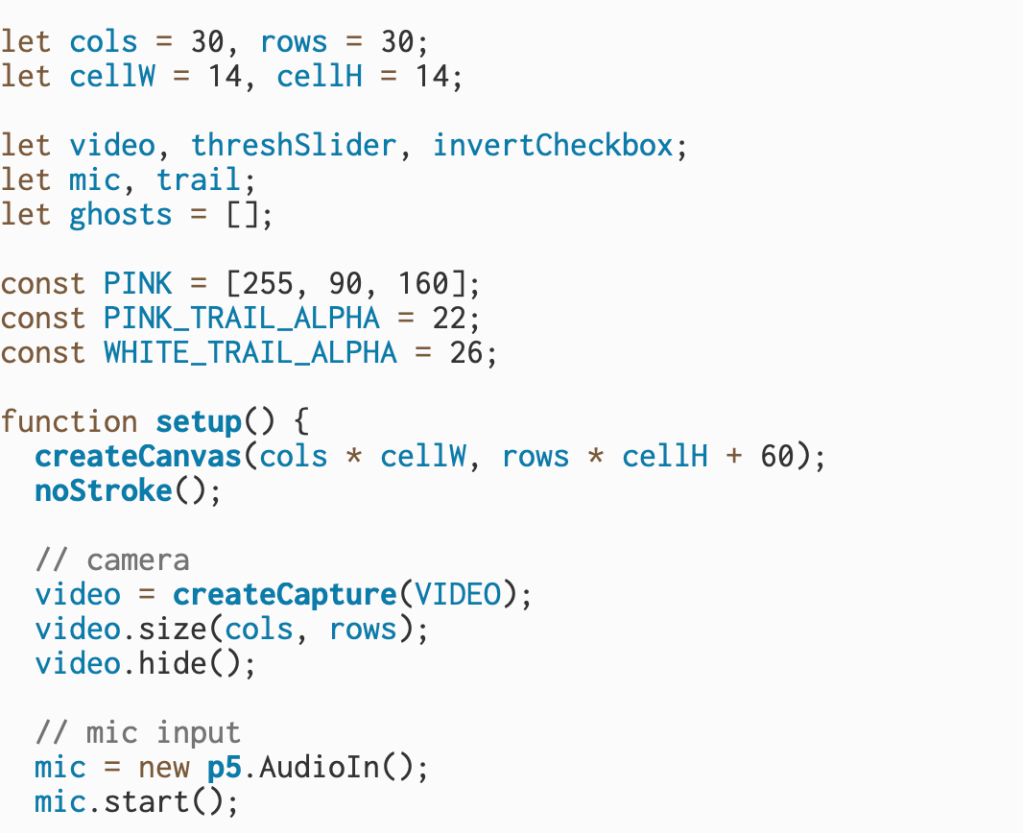
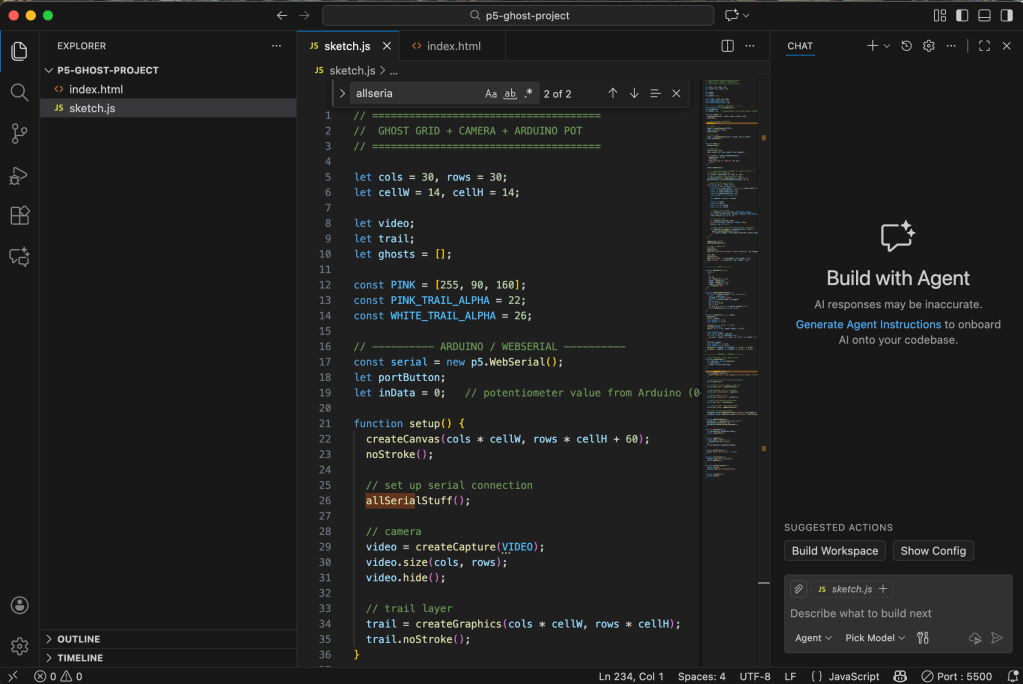
This block of code sets up the foundational elements of an interactive sketch that uses both the webcam and microphone to drive visual effects. It begins by defining a grid layout of 30 columns and 30 rows, with each cell measuring 14 pixels wide and tall—this sets up a low-resolution representation of the webcam feed that will later be used to create a pixelated visual. Several global variables are declared for the webcam (video), a threshold slider (threshSlider), an invert toggle (invertCheckbox), microphone input (mic), a graphics buffer (trail) used to leave fading trails behind drawn elements, and an array to store animated “ghosts” that appear based on sound input.
Next, the code defines a pink color using RGB values (PINK = [255, 90, 160]) and sets alpha values for both pink and white trails to control how they fade visually. Inside the setup() function, the canvas is created with enough space to hold the grid and an additional UI strip at the bottom. The webcam is initialized using createCapture(VIDEO) and resized to match the grid dimensions (30×30), then hidden from the DOM since it will be manually drawn.
The microphone input is also initialized with new p5.AudioIn() and started so it can detect the user’s voice or other ambient sounds. All of these elements lay the groundwork for a piece that will use brightness and sound to create interactive visuals—namely, ghost-like figures that respond to the user’s volume and webcam lighting.
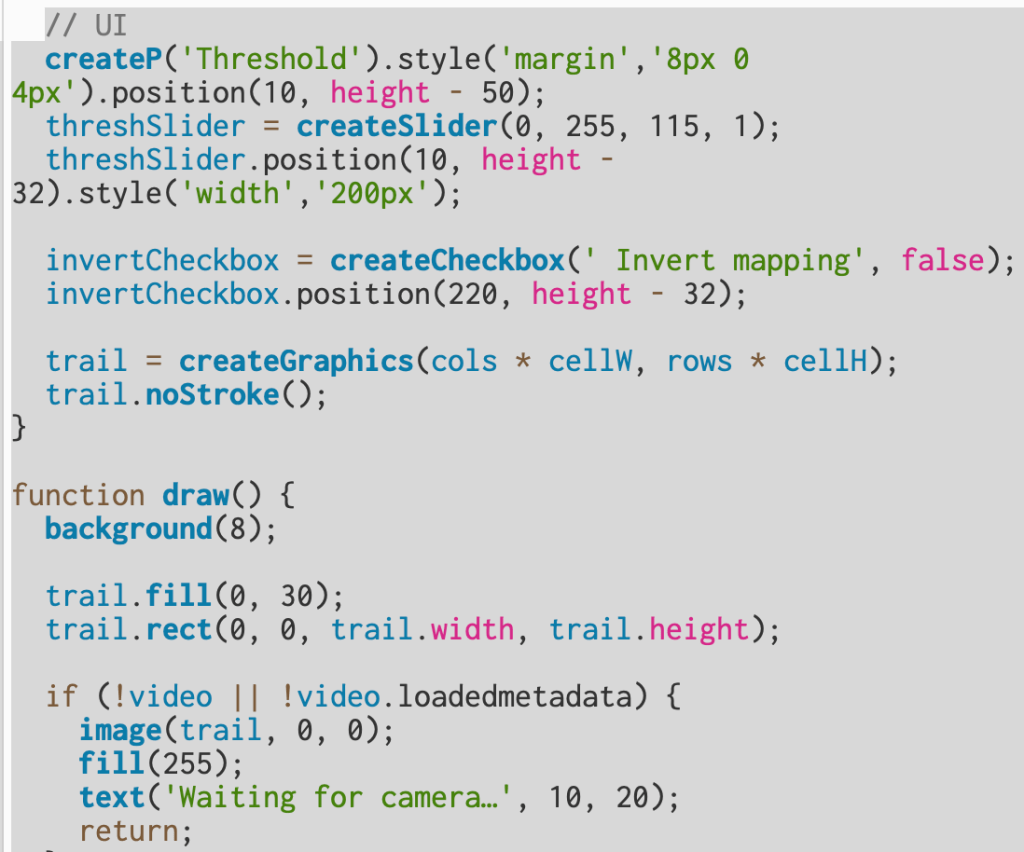
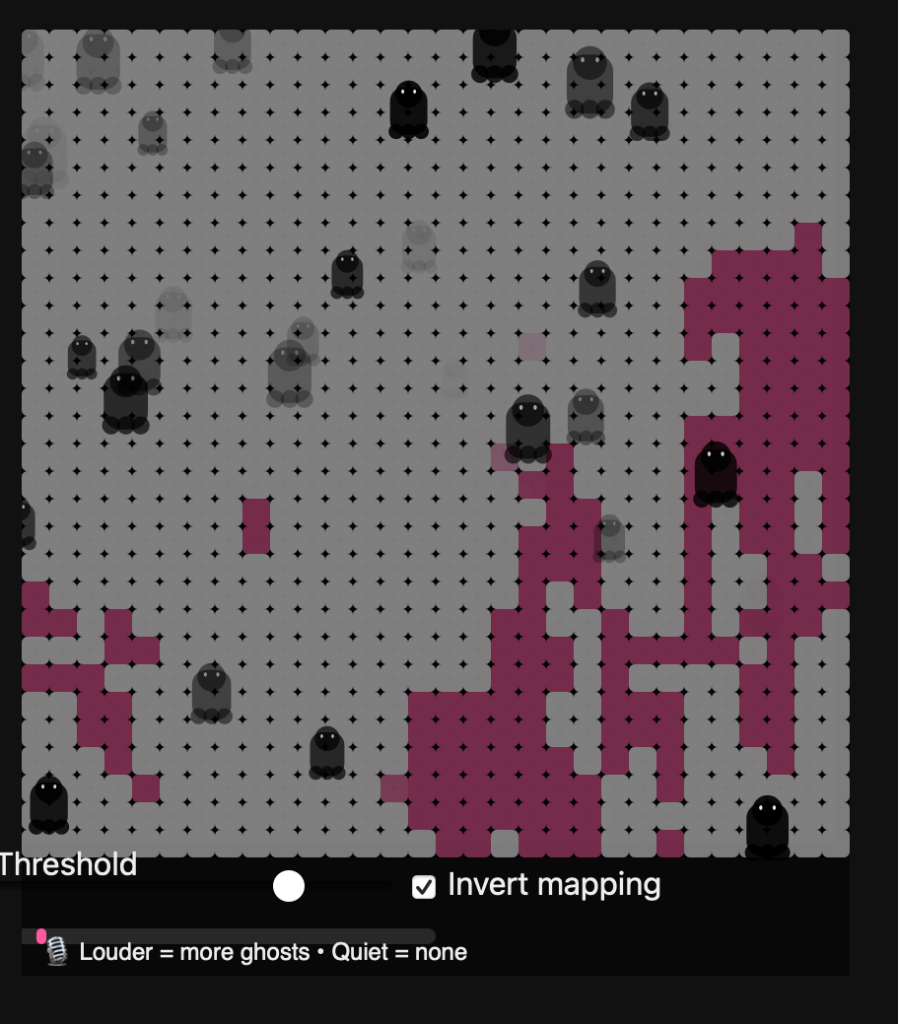
This section builds the interface and defines how the camera and microphone data are turned into the animated visual. The UI elements include a threshold slider and an invert checkbox that let you control how bright or dark areas from the webcam appear on screen. The slider, created with createSlider(0, 255, 115, 1), sets a brightness cutoff—pixels brighter than this value become white, and darker ones become pink. The checkbox toggles that logic, so you can flip which areas show up as white versus pink. Both controls are positioned near the bottom of the canvas for easy access.
The trail graphic, made with createGraphics(), acts like an off-screen canvas used to draw fading color trails. Every frame in draw(), the background is reset to a dark gray (background(8)), and a semi-transparent black rectangle is drawn over the trail layer to slowly fade old visuals instead of clearing them completely—this creates a ghostly persistence effect.
Next, the code checks if the webcam is ready; if not, it displays “Waiting for camera…” and pauses rendering. Once ready, it reads pixel brightness from the webcam image (video.loadPixels()), compares it to the threshold, and draws a 30×30 grid of small rectangles representing light and dark areas. White cells mark bright regions of the camera feed, while pink cells represent darker ones.
The microphone level (mic.getLevel()) is also read each frame and mapped to a normalized “loudness” value between 0 and 1. This loudness determines how frequently new “ghost” particles are spawned. When the sound is louder, more ghosts appear in white regions; when quiet, none appear. Each ghost is created using the makeGhost() function, which gives it random movement and transparency. Over time, ghosts fade and drift upward, producing a floating effect.
Finally, the program displays a sound meter bar and a label that reminds the user: the louder the mic input, the more ghosts appear—turning sound and brightness into a reactive, visual experience.
This final section ties the whole sketch together visually and interactively.
At the end of the draw() function, image(trail, 0, 0); places the fading trail layer on top of the background, blending together the motion and color history from previous frames. Immediately after, updateAndDrawGhosts() is called — this function animates every ghost stored in the ghosts array. Each ghost moves upward (vy is a small negative speed) and sways side to side using a sine wave (swayA and wiggle control how wide and smooth that motion is). Over time, each ghost’s transparency (a) fades out, and when it becomes invisible or drifts off-screen, it’s removed from the array.
The drawGhost() function is responsible for the actual shape of the ghost. It builds a stylized cartoon ghost using basic p5 shapes — a circular head, a rectangular body, and three “scallop” circles at the bottom for the wavy edge. The eyes are drawn as two small white ellipses, giving each ghost personality. The size (r) and transparency (alpha) vary for each ghost, making the scene feel more dynamic and layered.
After the ghosts are drawn, drawMicMeter(loudness) creates a small volume bar at the bottom of the canvas. The bar’s width grows with microphone volume, giving the user a live reading of their sound level. Finally, a short label is displayed below it — “🎙 Louder = more ghosts • Quiet = none” — which explains the relationship between sound and visuals. Together, these functions turn sound and motion into a responsive, ghostly mosaic that fades, drifts, and reacts in real time.
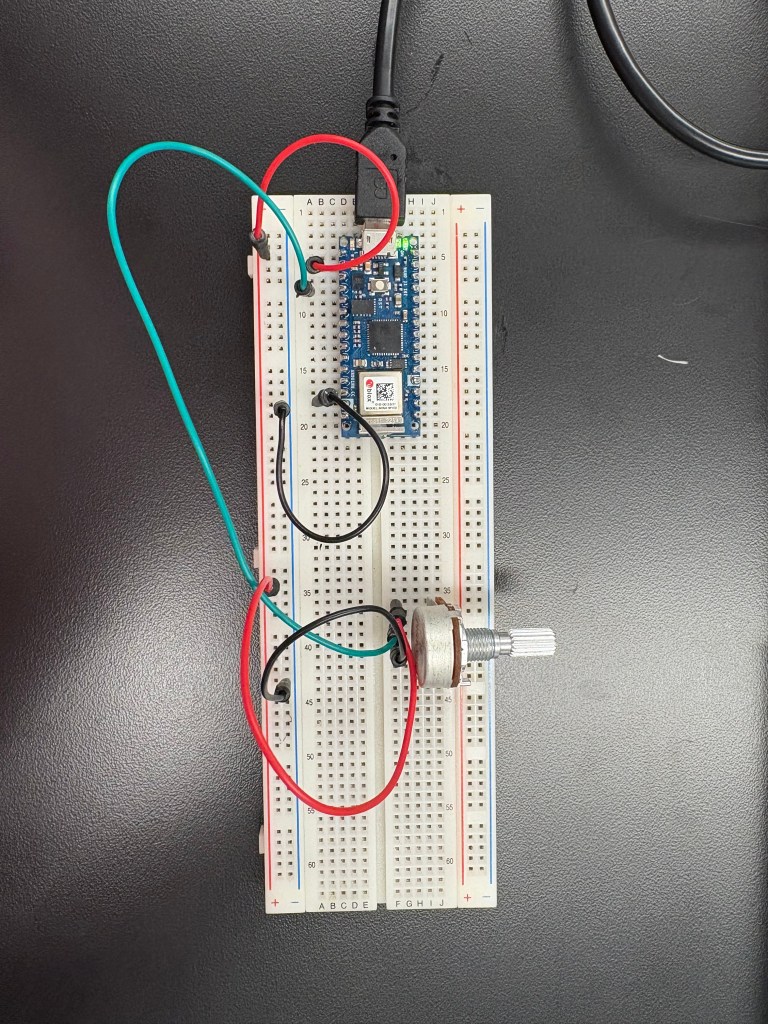
After getting the main structure of my sketch working, I moved on to integrating my Arduino. I connected my breadboard and, to simplify things, I removed all the sound elements from this phase of the project. Instead, I focused on using the potentiometer as a physical controller. The goal was to let the knob adjust the lighting inside my p5 sketch—something tangible that reacts directly on screen.
This part of the process was more experimental. The potentiometer is supposed to act like a light dimmer, but it can be noisy, which means the values jump around even when you’re not turning it. Still, once the wiring was correct and the serial connection was stable, I was able to map the incoming analog values to the brightness of the visualization. It created a really satisfying feedback loop: turning the knob physically changed what I was seeing in real time.
Beyond just making the interaction functional, this step helped me understand how physical computing and digital media intersect. Even something as simple as adjusting light with a knob shows how hardware and software can talk to each other, and how these small bridges between the physical and digital worlds can completely shift the tone and experience of a piece.

Leave a comment