12.9.25
Final Project w/o Pcomp: https://editor.p5js.org/itsnandibby/full/LsYB4n1j-
Final Project w/ Pcomp: https://editor.p5js.org/itsnandibby/full/WauQLFTpg
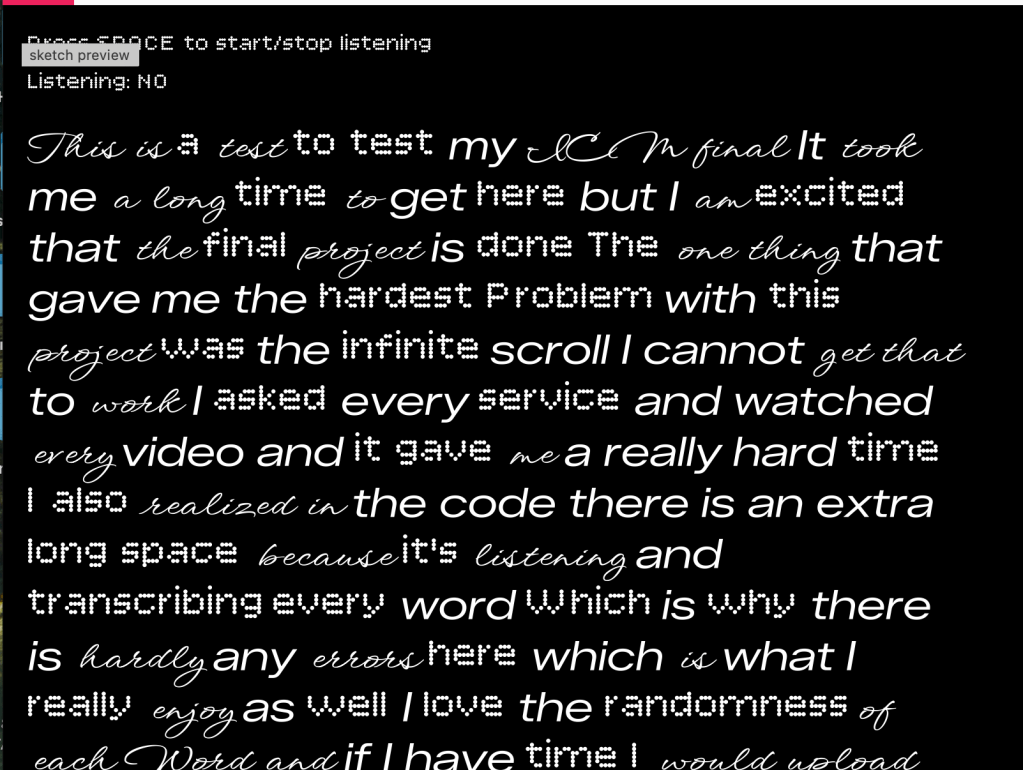
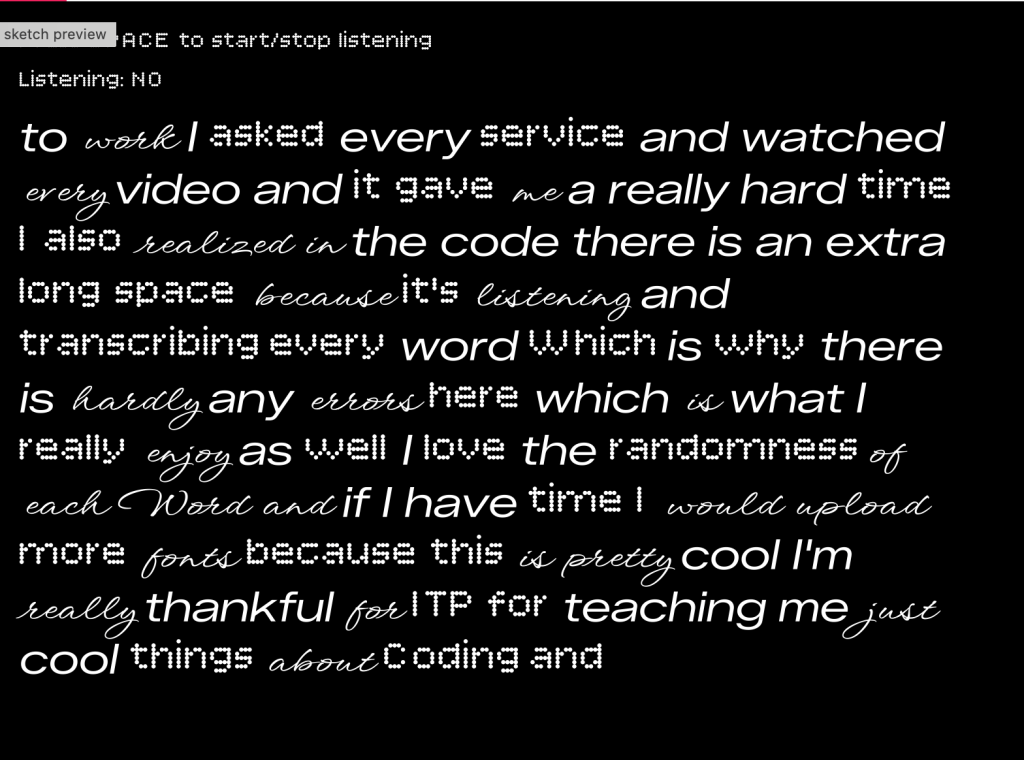
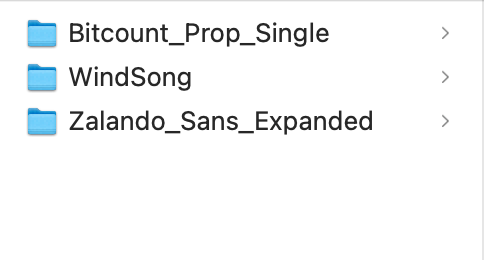
I decided to combine my P5 final with my ICM final by creating a project that connects audio, typography, and eventually physical computing. The goal was to start with speech-to-text in P5, then later integrate my breadboard mic so I can track sound input or use a potentiometer to control background colors. I began in P5 by choosing three fonts from Google Fonts that felt visually distinct. After downloading them, I uploaded each font file directly into the P5 editor so I could randomly apply them to every word that appears on the screen as I speak.
I then started to dive into the code using P5 Youtube videos, Claude, and Chat GPT for direction. I pieced by pieced diffrentsm instructions from each medium to complete my final ICM portion of the project.
Fonts below –
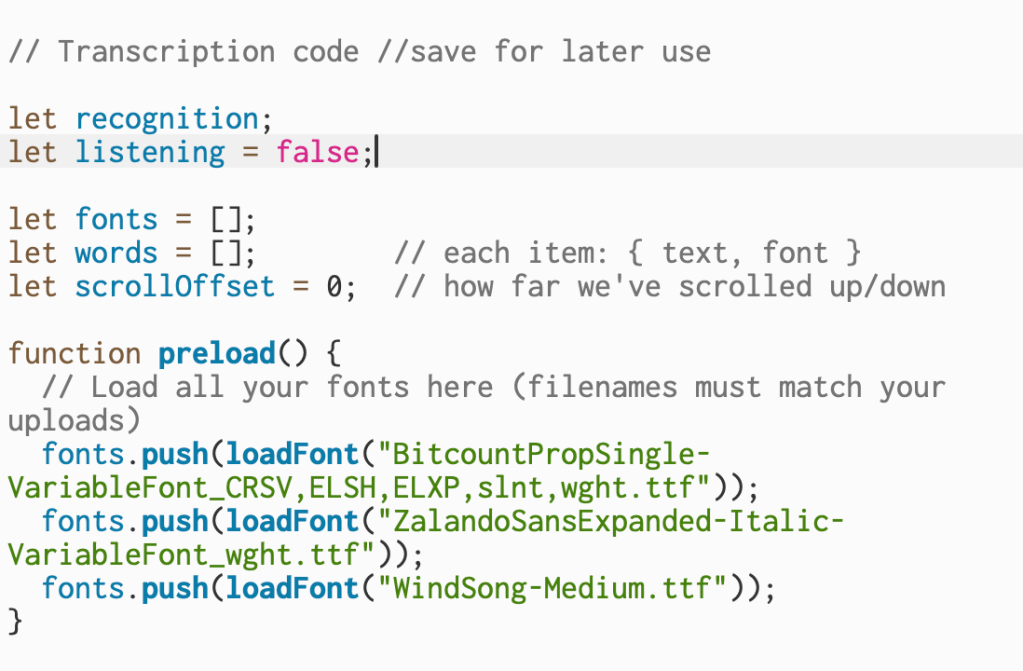
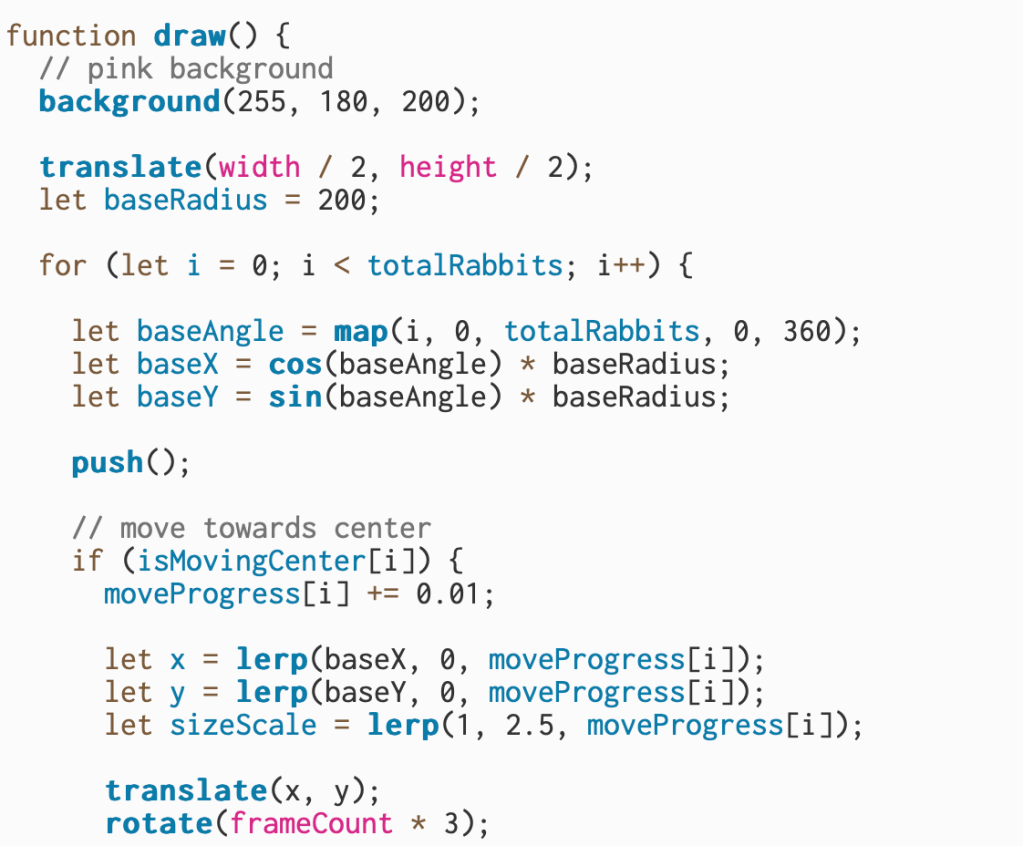
This section declares the variables that handle speech recognition, track whether the mic is active, store the uploaded fonts, and keep each spoken word with its assigned font. The scrollOffset variable keeps track of how far the text has moved on the screen. The preload function runs first and loads all of the font files so they’re ready to use when the sketch begins.
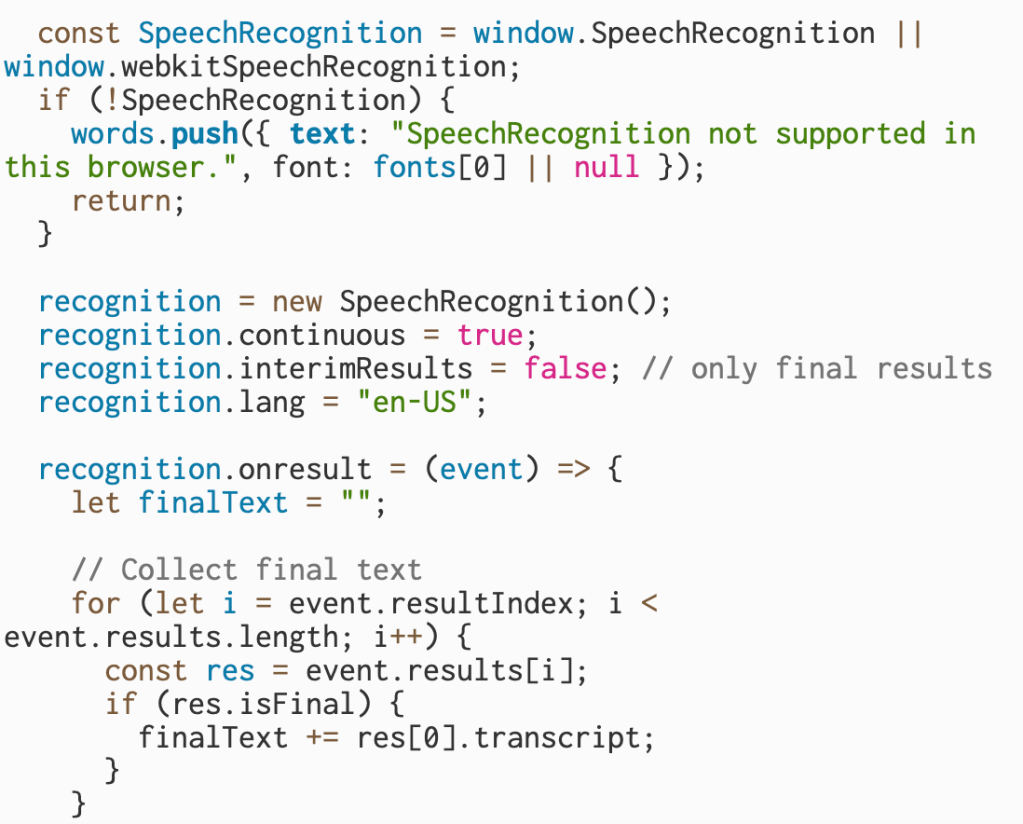
This part checks whether the browser supports speech recognition and, if it doesn’t, displays a message instead of running the rest of the program. If it is supported, it creates a new speech recognition object, sets it to keep listening continuously, turns off interim results so only finalized text is used, and sets the language. Inside the onresult function, the code collects only the final transcribed text from each result and saves it so it can be processed word by word.
I wanted to make sure that the mic picked up on every word and was as concise as possible.
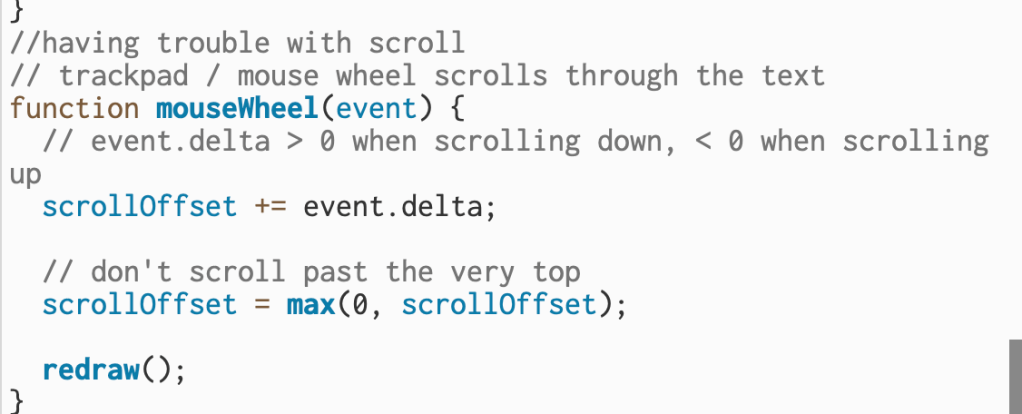
Throughout the code I am managing live speech input, assigning random fonts to each word, and keeping the text moving upward as more words appear. However, this section is where I had trouble: getting the scrolling to behave consistently. The mouseWheel function is supposed to let the trackpad or mouse control how far up or down the text moves, but fine-tuning the scrollOffset values so the movement felt natural took some trial and error.
In the end, this project helped me bridge two different parts of my coursework and build something that feels both technical and expressive. Working with speech recognition, typography, and scrolling logic pushed me to understand how information moves and updates on the screen in real time. Even though I struggled with things like smooth scrolling and font handling at first, each challenge forced me to learn more about how the system actually processes input. This gives me a strong foundation for the next phase of the project, where I’ll bring in physical components and let the breadboard interact with the visuals I built here.
Final Project: https://editor.p5js.org/itsnandibby/full/WauQLFTpg
11.25.25
Genre: Metal
Sophia and I don’t typically listen to metal music, but after doing some research, we learned that it relies heavily on drums, guitars, and vocals to build a chaotic, high-energy rhythm. To play against that intensity, we decided to create a contrasting interactive music video. We chose light, playful images of bunnies, but once the user clicks on them, metal music kicks in and the visuals animate into a swirling, chaotic circle.
Sweet → Soft → Sudden → Chaotic → Distorted → Release
In this project, the sound works more like texture and mood rather than melody or rhythm. Each rabbit triggers its own short audio clip, and the sounds act as a layer that enhances the glitch effect rather than forming a structured musical pattern.
P5 sketch here
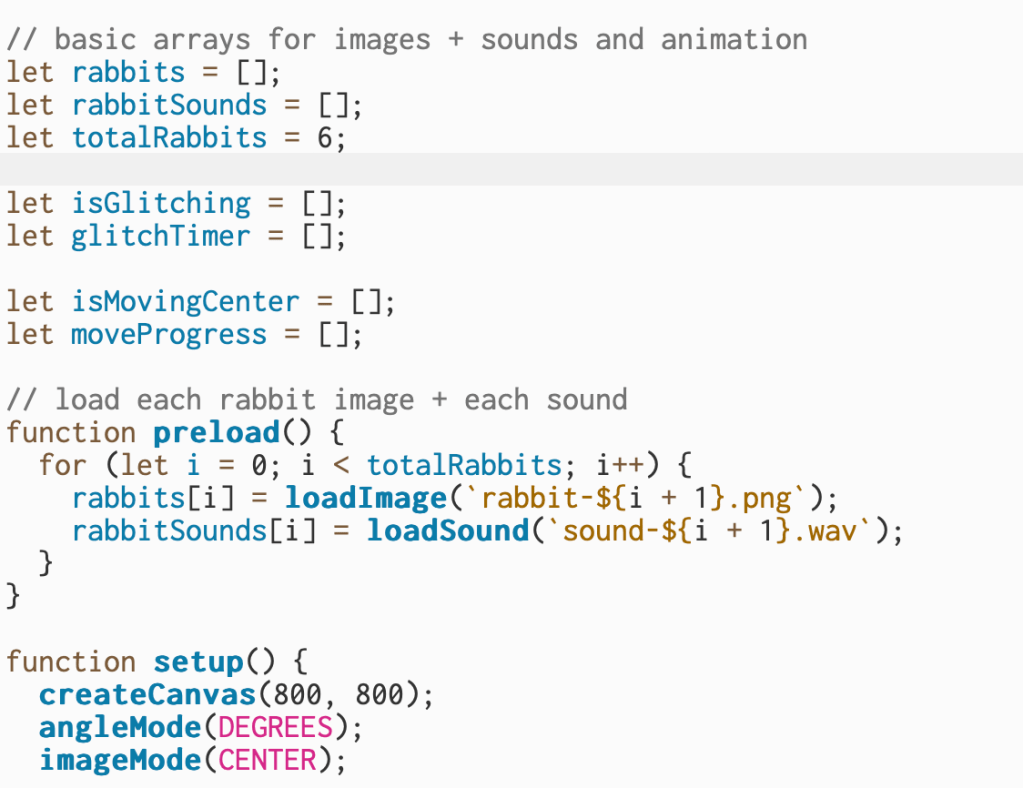
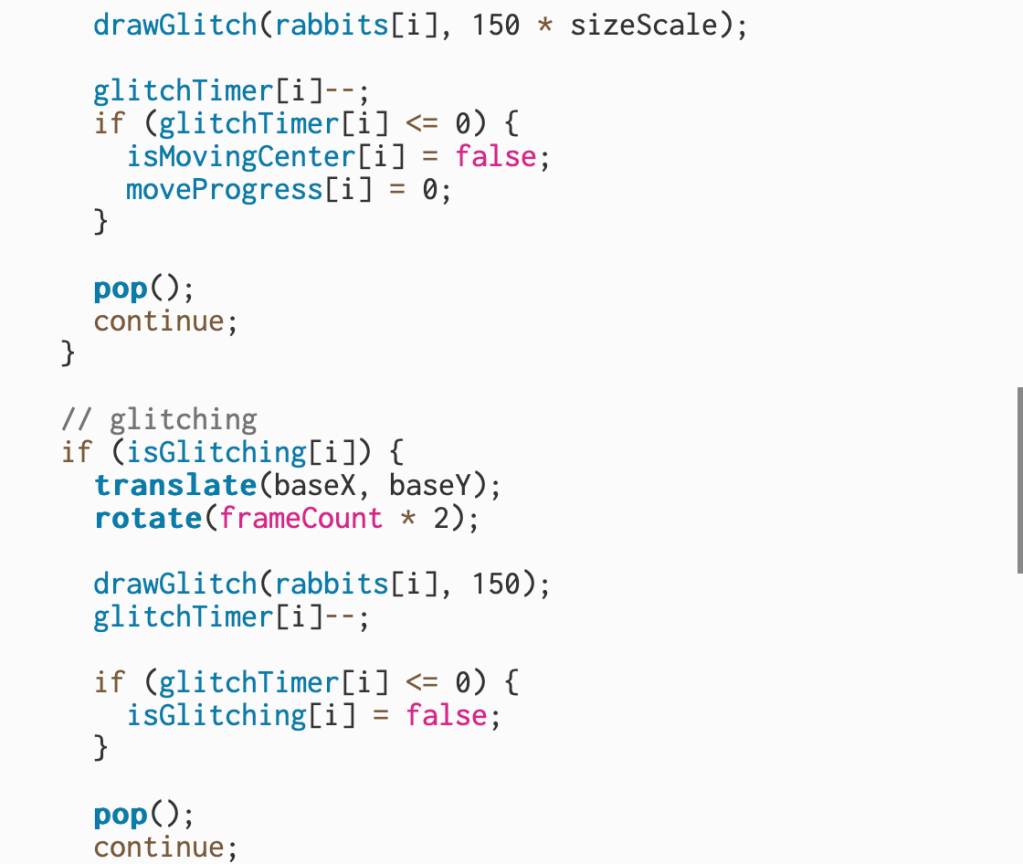

This sketch displays six rabbit images arranged in a circle, and each rabbit has its own sound connected to it. When the user clicks on a rabbit, it moves toward the center of the screen, becomes bigger, and plays a short glitch animation before returning to its spot. The background uses a soft pink color to help the rabbits stand out visually, and the animation loops continuously through the draw function.
Each rabbit has both an image and a sound stored in matching arrays. The preload function is responsible for loading all of the images and sound files before the program starts running. Inside preload, each rabbit image is loaded into the rabbits array, and each sound file is loaded into the rabbitSounds array. This makes it easy to access the correct sound by using the same index number as the rabbit image, and ensures everything is available the moment the sketch begins.
I struggled the most with adding sound to my sketch. At first, I couldn’t figure out where the files needed to go in the code or how to make each rabbit have its own sound. Once I learned that sound files must be loaded inside the preload function, things started to make more sense. Preload is the part of the code that runs before anything else, so it’s the only place where images and audio should be loaded. After that, I added a sound array that matches the rabbit image array. This let each rabbit have its own sound in the same numbered position.
Once I had both arrays set up, it became a lot simpler to connect the sounds to the rabbits when they were clicked. I also went to Jasmine’s office hours during the week, and she helped Sophia and me figure out how to make certain sounds loop instead of playing only once. That made the interaction feel more complete and helped us understand how p5 sound works in general.
11.11.25
This week, Zhaoquan and I connected to discuss our collaborative project, which centers on recording ourselves through our computer cameras to highlight the sense of togetherness within the ITP community. We both come from different communities, but have worked together twice on separate school projects. with NYU.
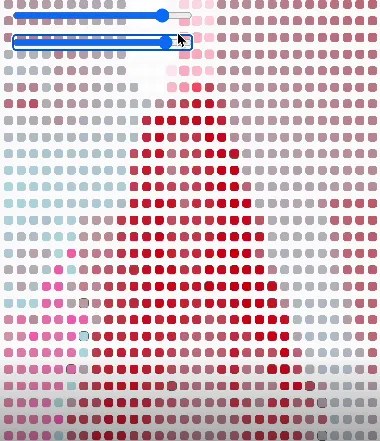
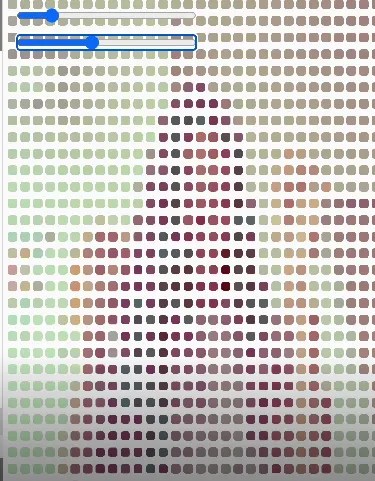
We expanded on the pixel-grid idea, using it as a metaphor for connection and participation. Each div element acts as a small portrait — a representation of someone in our network — and when two pixels share a similar brightness, they softly illuminate to symbolize a bond.
We also incorporated a gentle interactive ripple: as the cursor moves across the screen, nearby pixels subtly grow and brighten, creating a wave-like motion that suggests energy and interaction within the group.
Here is our final project below
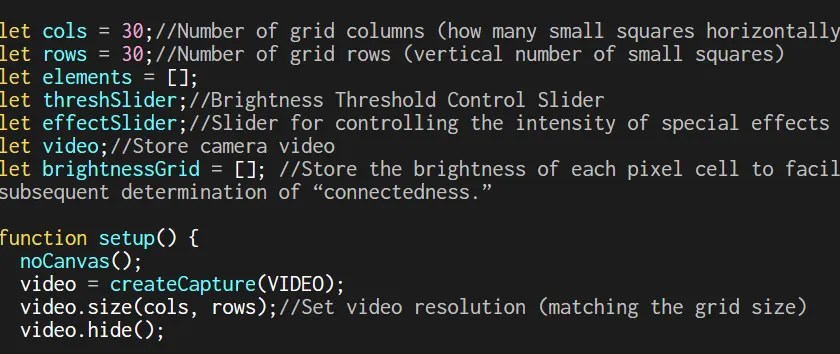
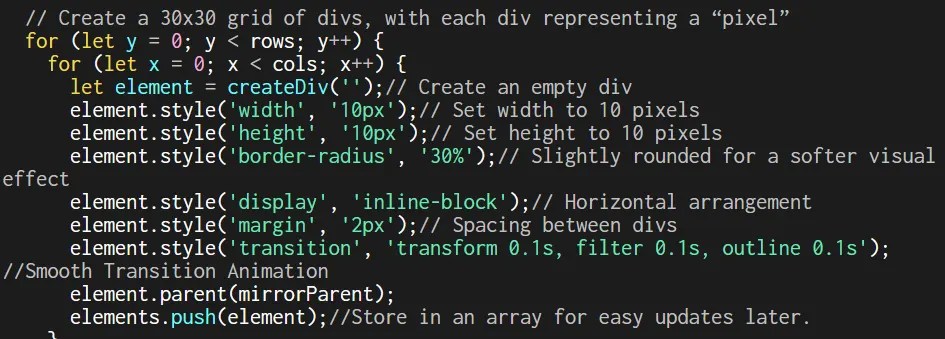
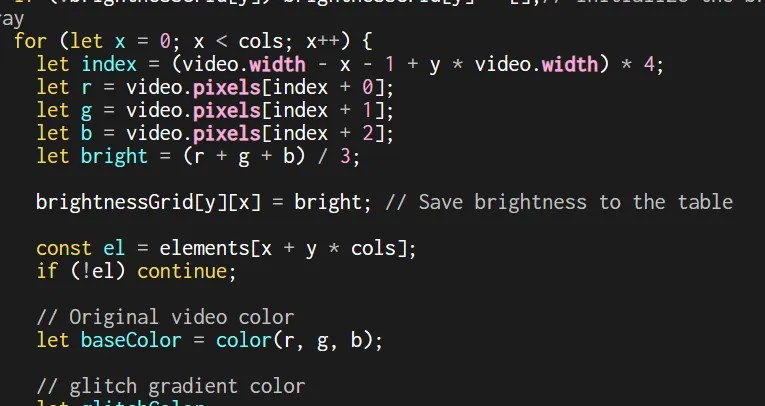

We began by setting up the webcam feed with createCapture(VIDEO) and resizing it to a 30×30 grid using video.size(cols, rows). We hid the original video and used video.loadPixels() to pull pixel data, turning each frame into a source for color blocks. Through two nested loops, we generated 30 columns and rows of divs, each one representing a pixel, and placed them inside a centered container called mirror.
We mapped the webcam’s pixel brightness to each div by averaging the RGB values from the pixels[] array. Brighter pixels became pink or green, while darker ones turned blue or red, forming a constantly shifting mosaic of warm and cool tones.
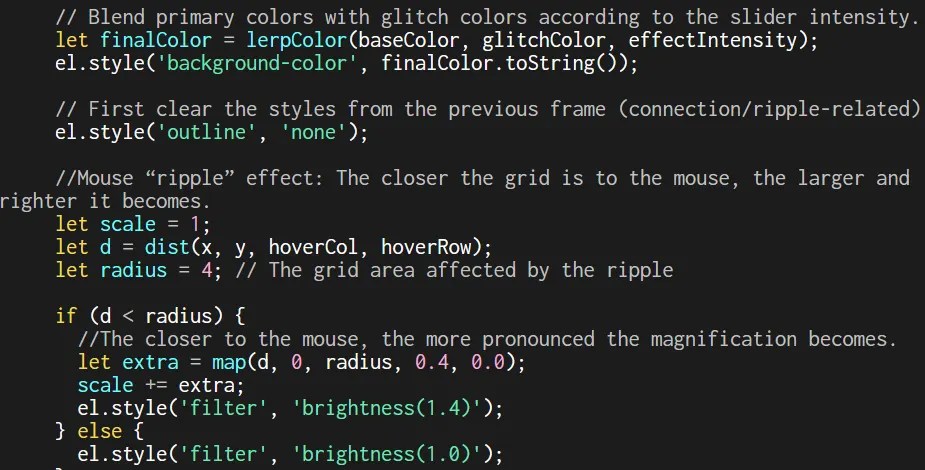
To make it interactive, we added two sliders: one controlling the brightness threshold and another for effect intensity. We then compared each pixel’s brightness to its neighbors; when two were similar, they shared a soft white outline, forming glowing clusters. Lastly, we created a mouse ripple effect where nearby pixels expand and brighten as the cursor moves across the grid, creating a subtle sense of touch and connection.
Reflection
This project served as a thoughtful exploration of how technology can visualize emotion and connection. Collaborating with Zhaoquan felt natural, I love working with her. Our communication flowed easily, and our roles complemented each other. I concentrated on shaping the conceptual direction, while she refined the technical side, ensuring our ideas translated smoothly into code. We ran into a few challenges with performance and debugging, but those moments pushed us to think more deeply about how p5.js, HTML, and CSS interact. What started as an experiment in pixel manipulation ultimately evolved into an interface that responds to movement and light, turning small gestures into a shared, living portrait.
Next Steps
Looking ahead, we hope to expand this project into a more immersive and collaborative experience. One idea is to connect two webcams capturing two participants at once and blending their live feeds into a single, shared portrait.
10.28.25
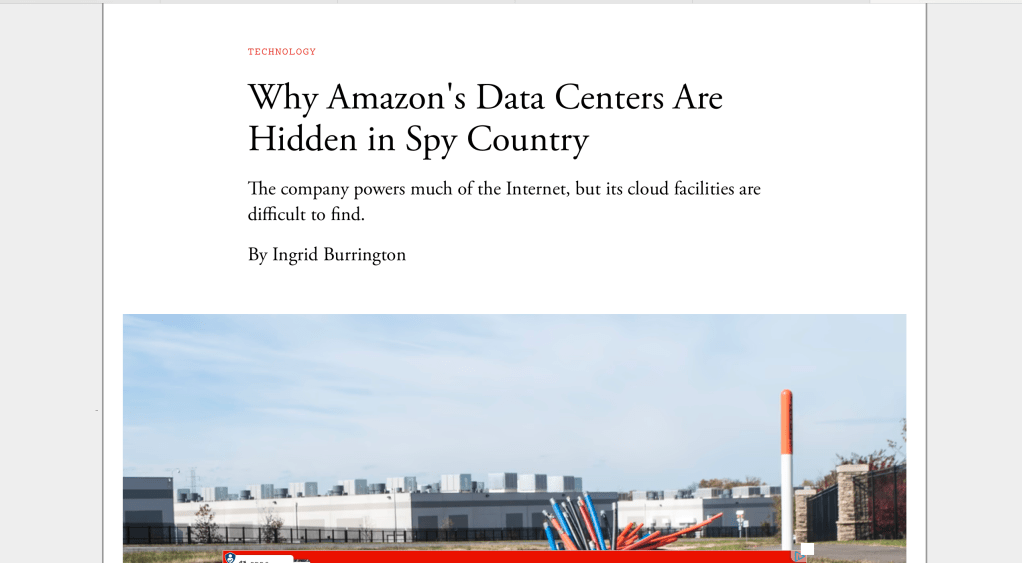
Ingrid Burrington’s piece pulls back the curtain on something we don’t usually think about — the physical side of “the cloud.” She takes readers through northern Virginia, a region filled with plain-looking warehouses that actually power much of the internet through Amazon Web Services. What I liked most about her approach is how she makes the invisible visible. These massive data centers are hidden behind gates and generic signs, yet they hold an enormous amount of power—literally and figuratively. Burrington breaks down how this secrecy isn’t just about security, it’s part of a larger narrative that keeps us detached from how the internet really works.
What stayed with me after reading was how much geography and control play into something we use every day. We think of the cloud as limitless, but it’s rooted in specific places—consuming energy, land, and labor. Burrington makes a point that because we don’t see it, we also don’t question it. That distance allows companies like Amazon to shape our digital world quietly, without much accountability. The story made me realize that the cloud isn’t this abstract space in the air—it’s built on real infrastructure that has real impact.
Write about how you currently use AI, and strategies you might have taken away from this class.
Throughout this class, I’ve used AI mostly as a creative collaborator and problem-solver. I rely on ChatGPT and Claude to help me debug code, organize my thoughts, and explain technical concepts in a way that feels approachable. When I was learning P5.js, it helped me understand how each function actually worked instead of just copying and pasting from examples. Sometimes I’d paste a block of code that wasn’t doing what I wanted and ask why—and through that back and forth, I started to see patterns in logic, syntax, and movement. Using AI this way taught me how to think through problems instead of just asking for quick answers.
One of the biggest takeaways from this class is learning how to use AI as a tool within the creative process, not as a shortcut. I’ve started asking better questions—more about why something works rather than how to make it work right away. That shift has helped me balance experimentation and intention, which shows up in my projects now.
10.21.25
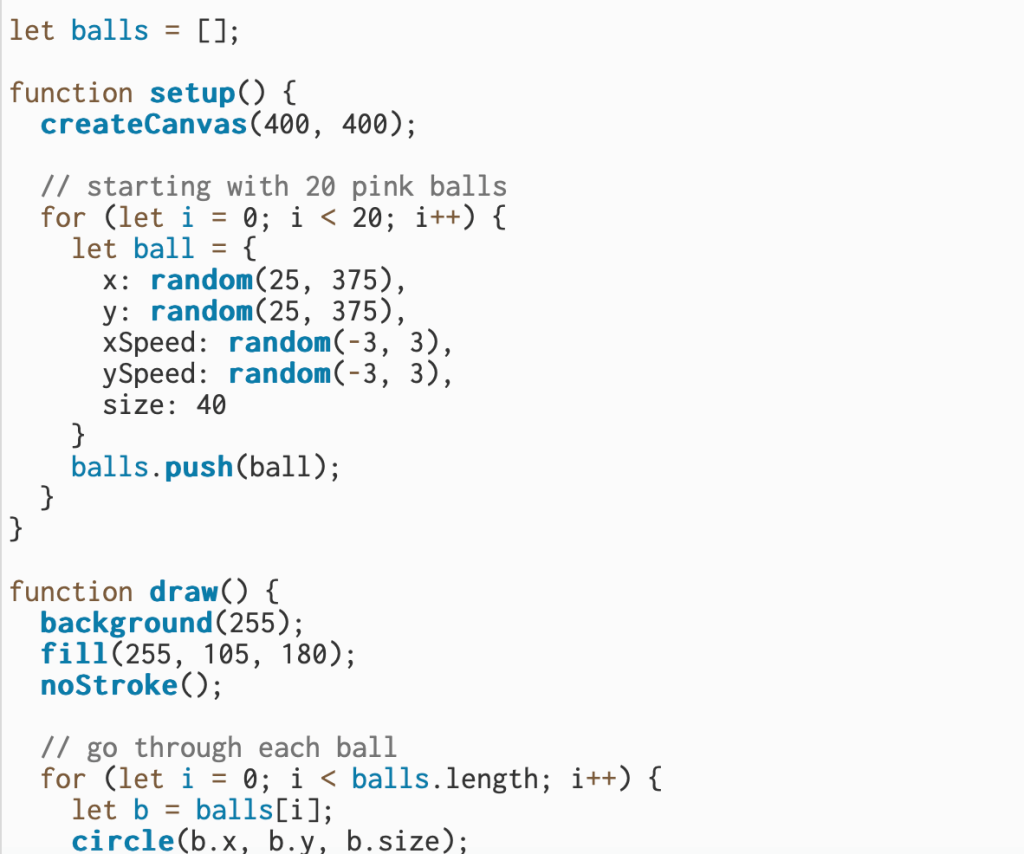
Make 2 bouncing balls
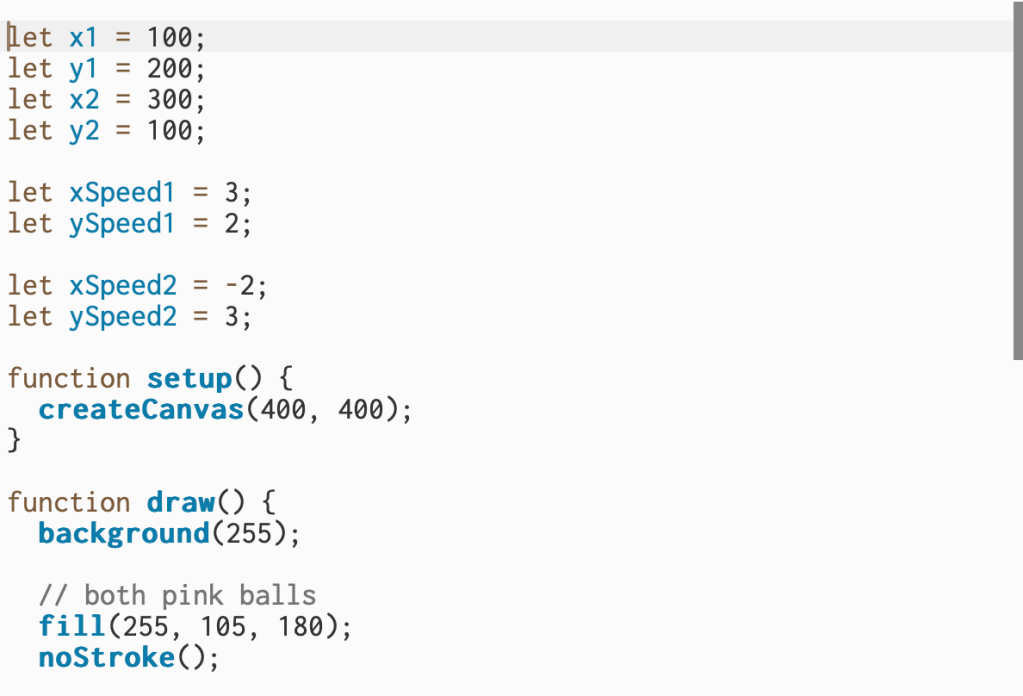

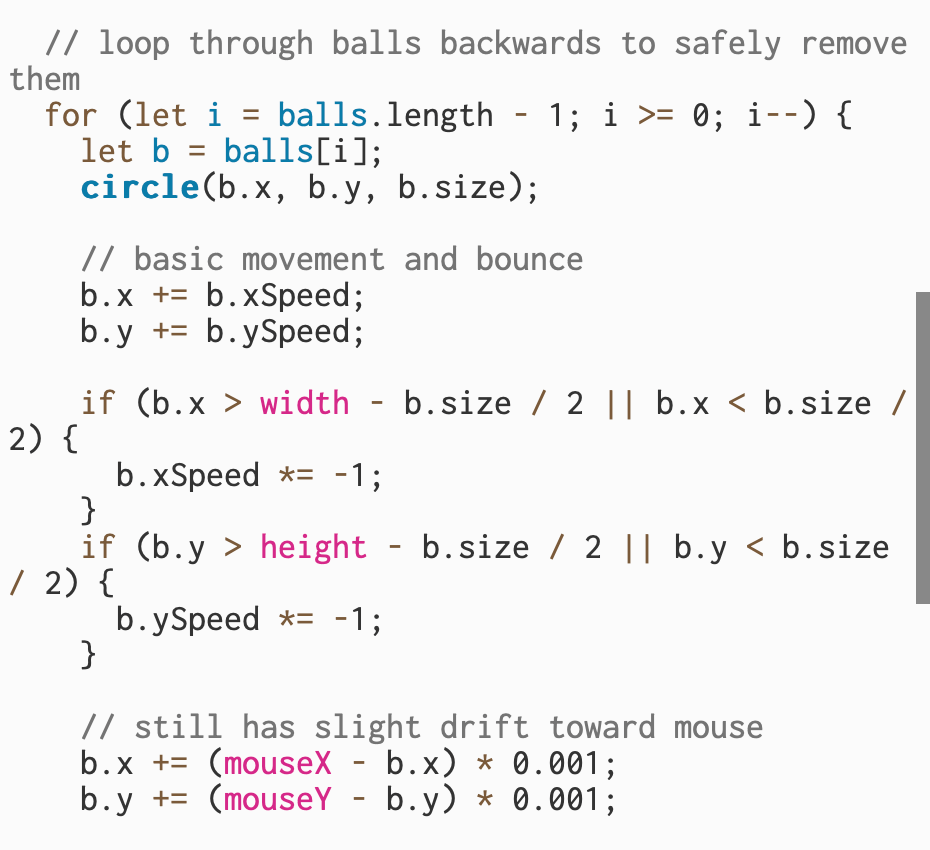
For the first question I created movement for both pink balls and made them bounce around the screen. I set each ball to move in its own direction and update its position every frame so it looks like they’re floating across the canvas. I also added conditions to check when a ball hits the edge of the screen — once that happens, the direction switches so it bounces back instead of getting stuck. Overall, this section controls all the motion and keeps both balls moving smoothly inside the frame.
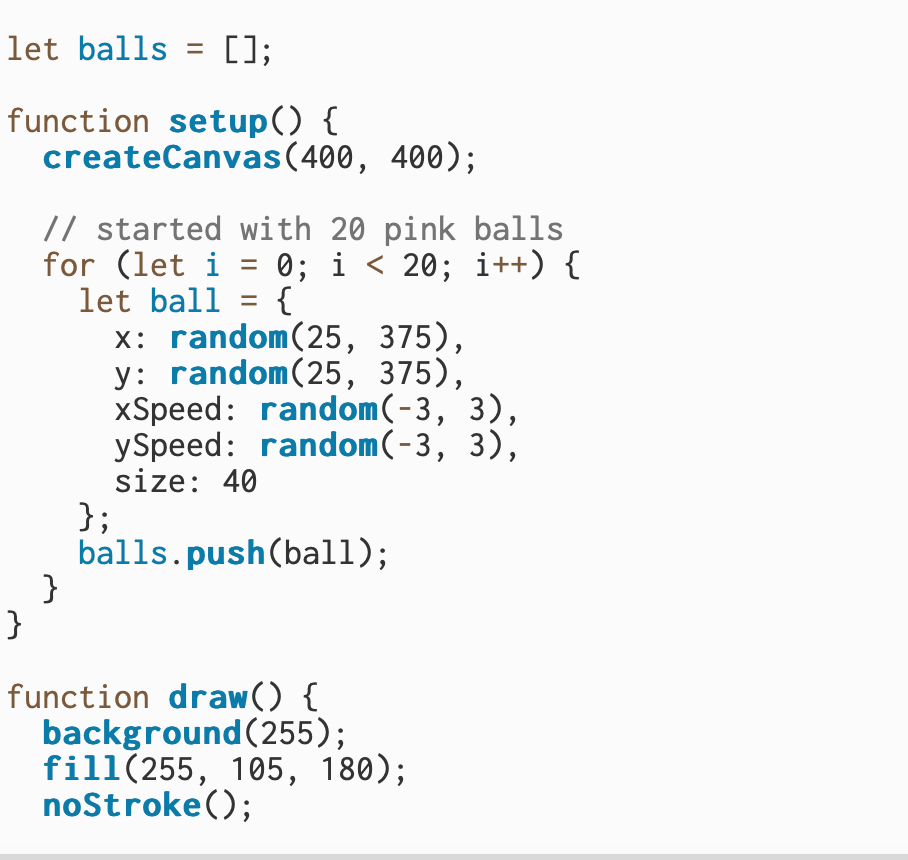
Make 20 bouncing balls
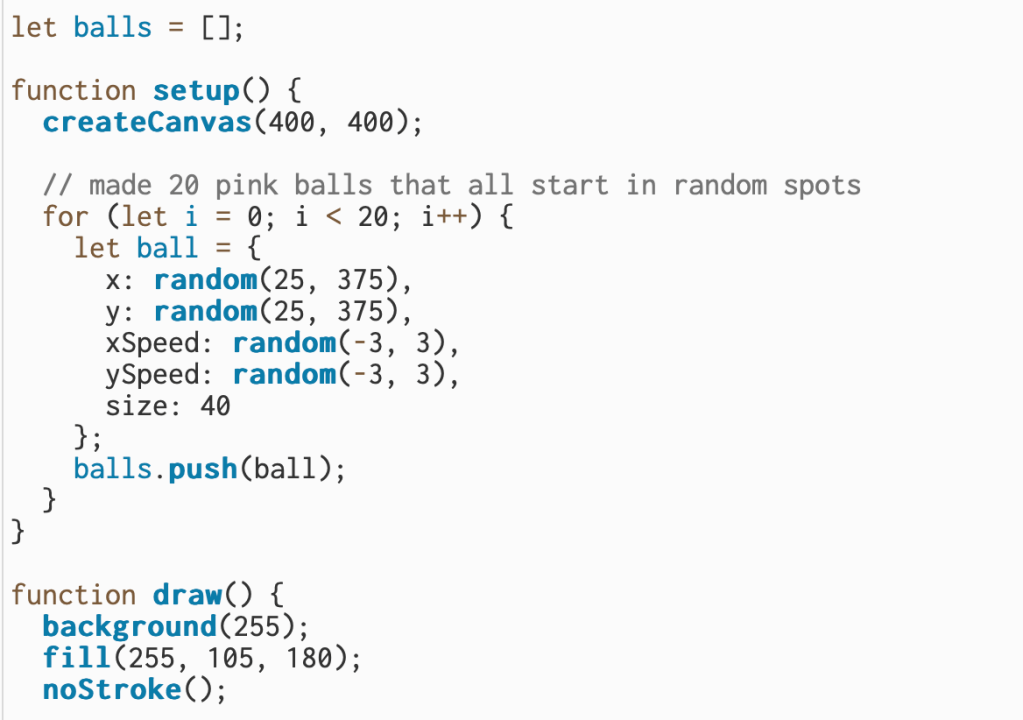

I built on the two-ball sketch and made twenty pink balls that all move on their own. Each ball starts in a random spot with a slightly different speed so they don’t all move the same way. I used a loop to go through every ball and update its position each frame, which makes the animation look busy and alive. I also kept the bounce logic from before, so when a ball hits the edge of the canvas, it flips direction and keeps moving. Overall, this version shows how I can take a simple idea and scale it up to make something more dynamic.
Add a feature: Create a new ball when you click the canvas.
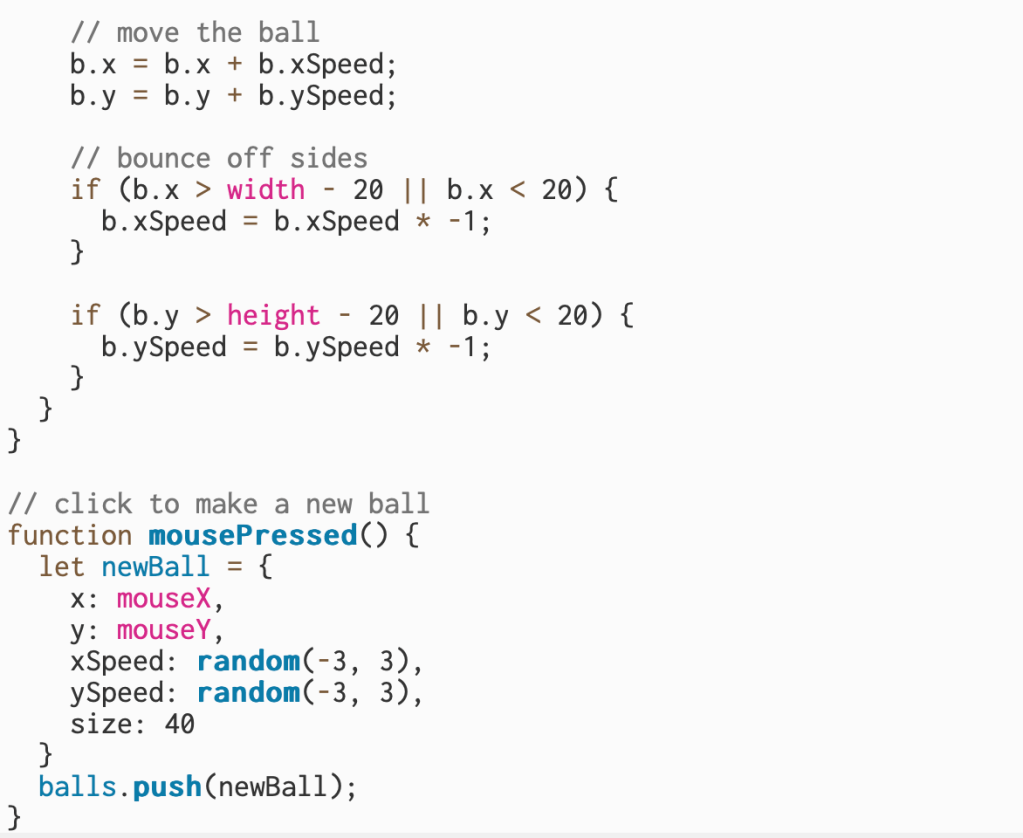
For this part of my project, I built on my bouncing ball sketch and made it interactive. I added a feature that lets me create a new pink ball anywhere I click on the canvas. Each time I click, a new ball appears in that spot with its own random speed and direction, then starts bouncing like the rest. I also updated my setup so that all the new balls follow the same movement and bounce rules.
Add a feature: Make the new balls move slowly towards the mouse.
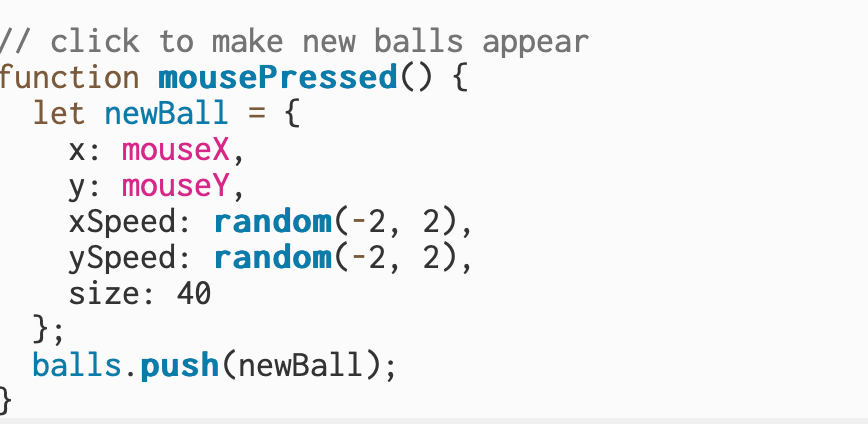
For this part, I started experimenting with how to make the balls move toward the mouse. I added a small change so that each ball slowly drifts in the direction of where my mouse is on the screen. It’s not perfect yet, it moves really slowly and don’t fully follow the mouse the way I wanted, but I got the basic idea working. I was trying to figure out how to control the speed and make the movement smoother, but I stopped here once I got a small reaction from the balls.
Add a feature: Add the ability to zap (delete) a ball if you mouse over it.
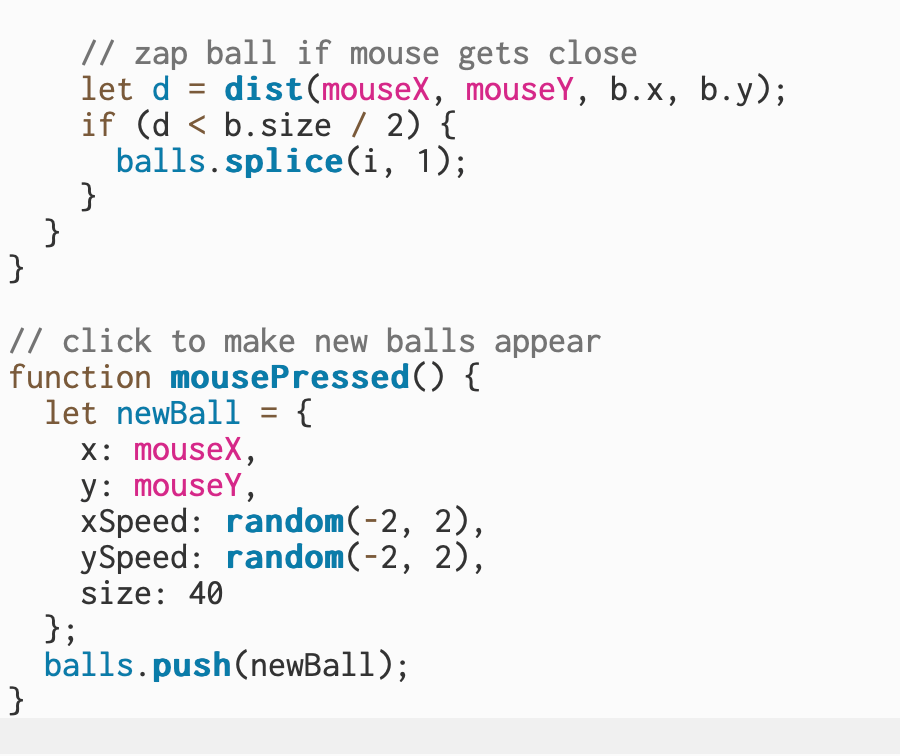
For this part, I added a feature that lets me delete a ball when my mouse moves over it. When I hover close to a ball, it disappears from the canvas. I used the distance between the mouse and the ball to tell when they’re touching, and then I remove that ball from the list. It’s a small detail, but it makes the sketch feel more interactive.
10.7.25
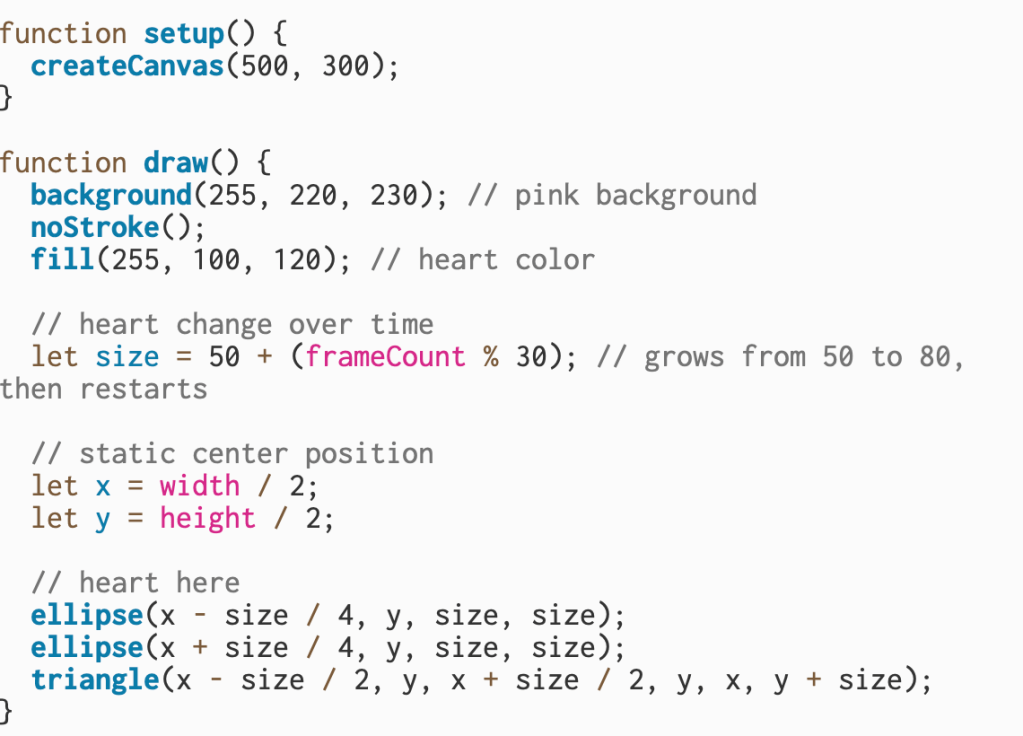
Since I wasn’t in class last week because I was redoing my earlier assignments, I needed to take some time to really understand what Sam was asking for in this one. I asked Claude to help me break it down, and that’s when I started to see that “labor” is basically the work I’m telling the code to do, and this assignment pushes us to break that labor into smaller parts – its like having different departments that each handle their own job instead of one person doing everything. Sam gave us the option to reuse an old sketch, so I decided to stick with my simple throbbing heart to better understand how functions can organize and control the labor of my code.
Here is the original code of the heart
When I first started this assignment, I honestly didn’t know how to name or organize my functions. I had to slow down and really break it apart to understand what each part of my code was doing. Once I started researching code, it clicked that every piece has its own job or “labor.” Before, everything was sitting inside one big draw() function, but now I can actually see how breaking it into smaller sections makes the code way easier to read and understand.
This is when I started figuring out what needed to be in my reorganization. I looked at my heart code and realized it could be broken down into three main parts: the background, the calculation for the size, and the drawing itself. Once I separated those out, it finally made sense how each function worked together to keep the sketch running.
After that, I started looking up what functions I would need to restart and rebuild my code. I wanted to understand which parts of my original sketch could turn into their own functions and how to name them so they made sense.
I wrote down a vocab list to help me understand what each function was doing and how it connected to the bigger sketch. Breaking it down this way made it easier to see how the code was organized. I realized while redoing these projects, vocabulary is extremely important. And once I can break down the vocabulary, I feel more comfortable with the project.
setup: Runs once at the beginning to create the canvas, starting point for everything.
draw: Loops over and over again and calls the other functions in order.
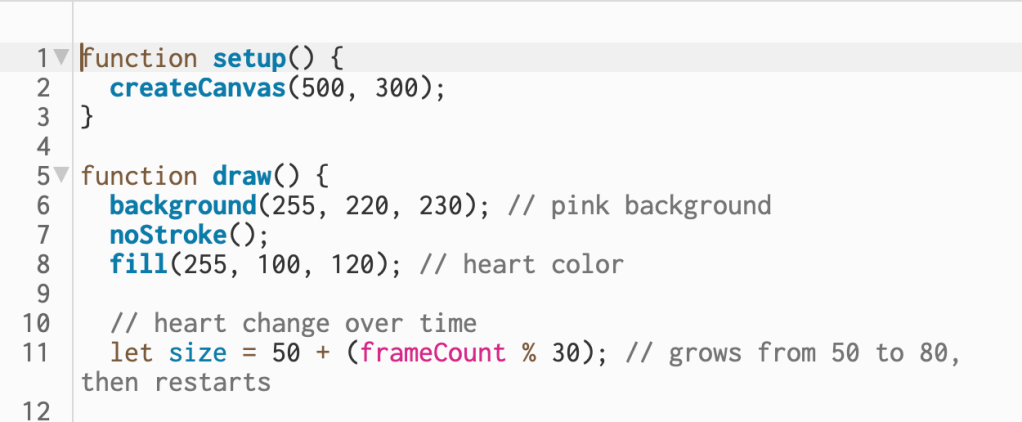
makeBackground: Handles the background color and keeps it clean each frame so the heart doesn’t leave trails.
getHeartSize: Calculates how big the heart should be based on time, creating the thumping.
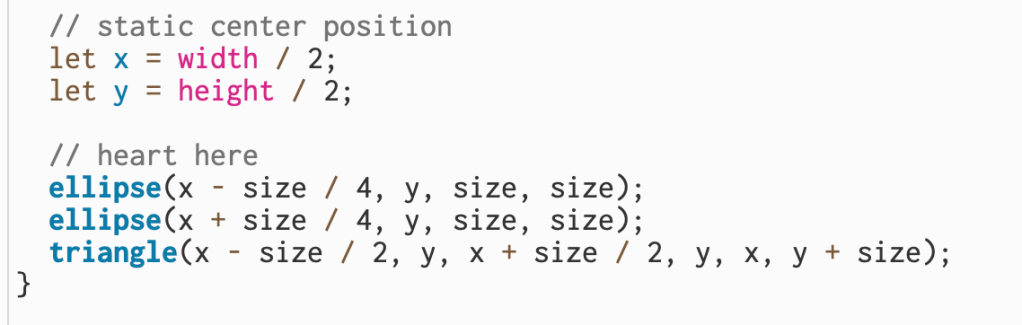
drawHeart: Draws the actual heart using simple shapes, the two circles and one triangle.
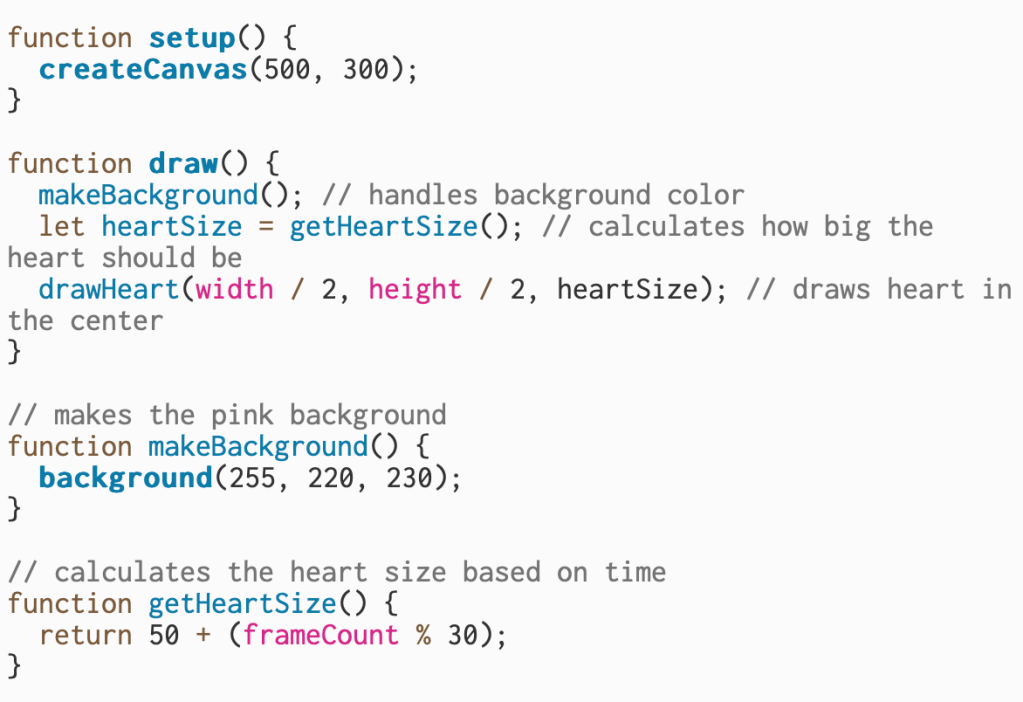
I decided to start with a new template so I wouldn’t mess up my original heart sketch. Once I learned the vocab and broke down what each part of the code was doing, it became much easier to rebuild the project using the new functions. Understanding how to organize the code this way made it feel less confusing and more like I was giving each part a clear job.
In this section, I reorganized my code so that each function has a specific job. The setup() function creates the canvas, while draw() calls the other functions to keep things running smoothly. makeBackground() handles the pink background, and getHeartSize() calculates how big the heart should be as it “beats.”
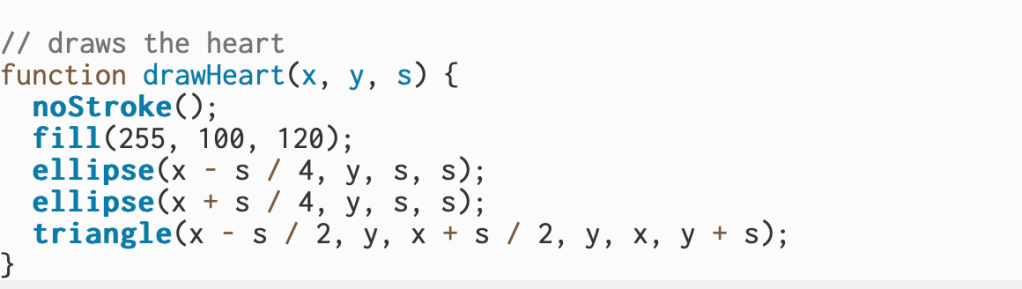
The drawHeart(x, y, s) function is responsible for drawing the heart on the screen. It uses the values from draw() to decide where the heart goes and how big it should be. Inside, it removes the outline, fills the color, and uses two ellipses and a triangle to form the full heart shape.
10.30.25
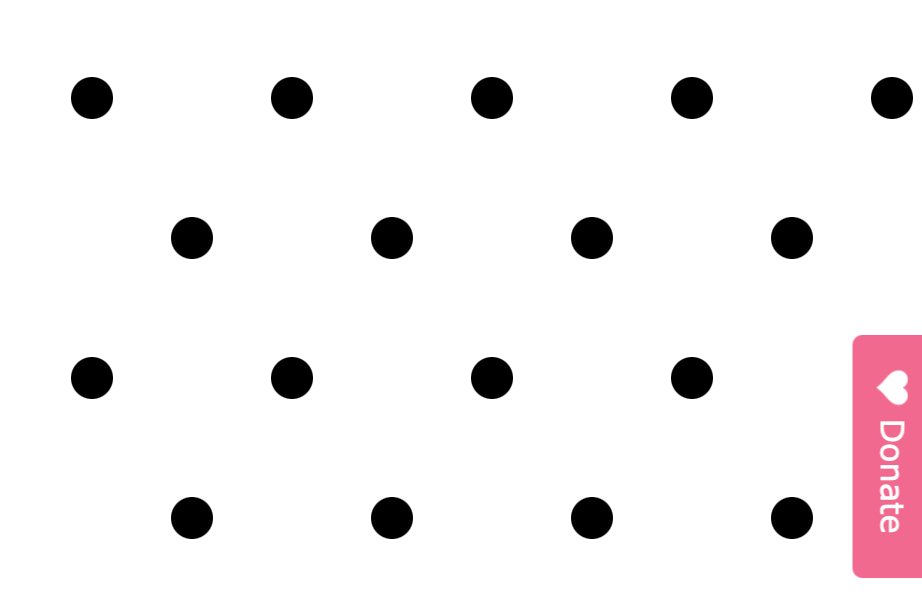
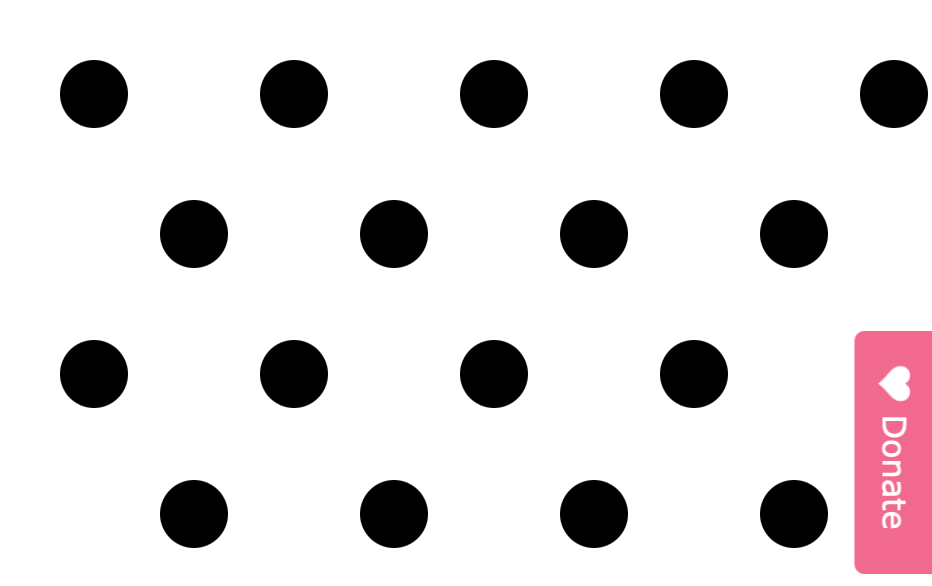
For this Week 4 assignment, I created a pattern of black polka dots on a white background that thump together by slightly changing size over time. The repetition makes the pattern easy to see, while the movement adds like a moving wallpaper . I originally wanted the dots to change color when clicked, but I didn’t have time to finish that part. Still, this project helped me understand how small changes and interaction can make a simple design feel more alive. This is where I really started to get the hang of everything, Transparently, I did this after the ICM assessment test when I realized I need way more practice in loops..
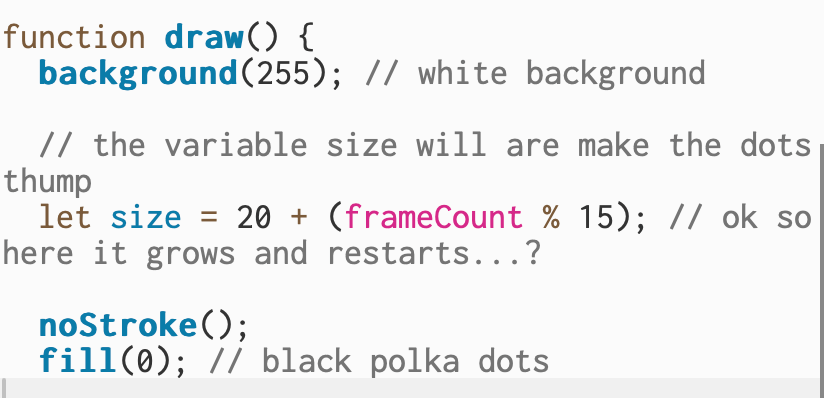
In this part of my code, I set the background to white so the pattern stays clean each time the frame refreshes. I created a variable called size that makes the dots grow slightly and then restart, giving them a thumping effect. Using noStroke()removes the outlines, and fill(0) keeps all the dots solid black for a simple look.
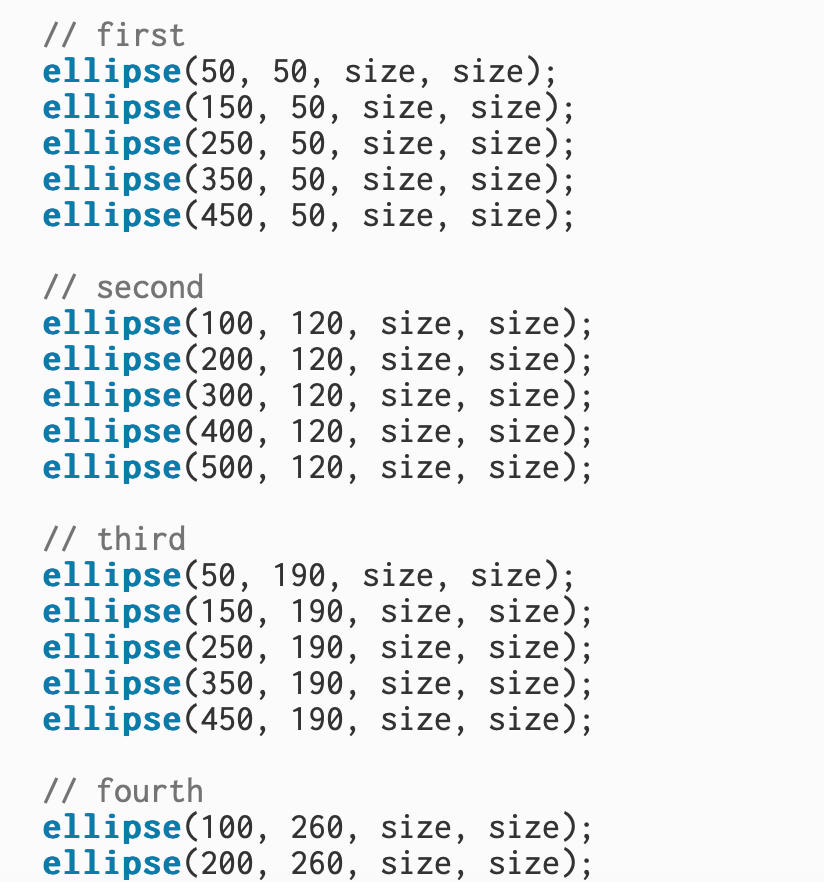
In this section, I used multiple ellipse() shapes to create rows of evenly spaced polka dots across the canvas. Each row repeats the same shape and size variable, which builds a clear, structured pattern. After placing a few rows, it became mostly repetition, copying the same line of code with different X and Y positions to fill the page and complete the design. https://editor.p5js.org/itsnandibby/sketches/hMZmgzrTF
9.23.25
Updated Sketch + Documentation

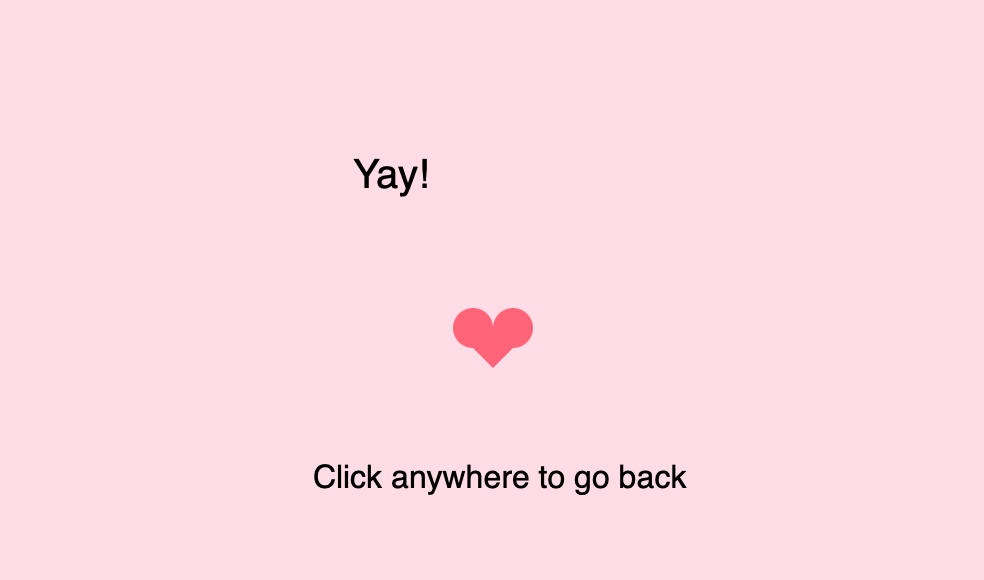
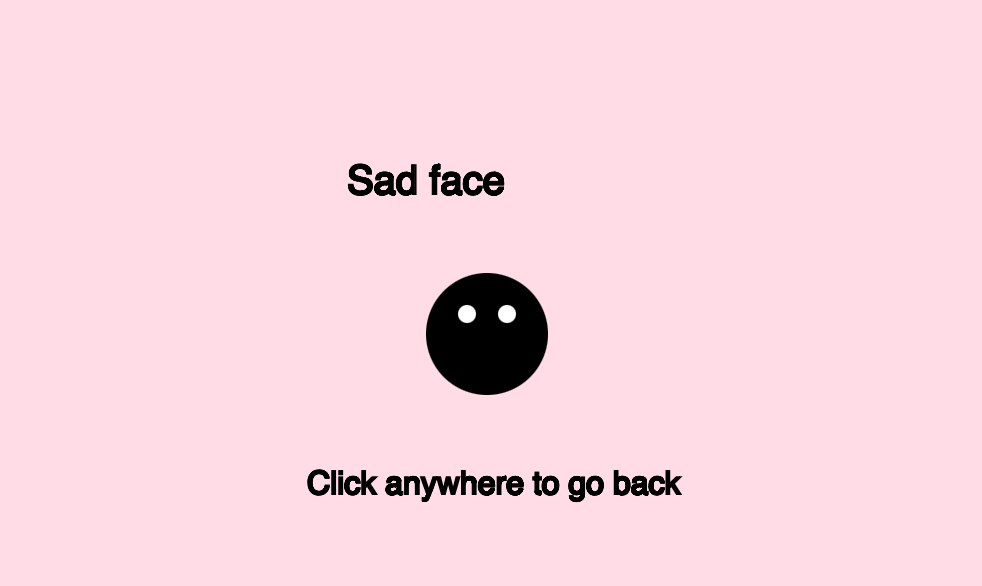
For the third week assignment redo, I wanted to keep things simple and focus on using conditional statements in a fun way. I created a small interaction that asks the question “Do you love me?” with two buttons for “Yes” and “No.” If you click “Yes,” a heart appears, and if you click “No,” a sad face shows up. It was a straightforward way to practice using if and else conditions. This project was a little complicated because it required me to track multiple outcomes and reset the screen after each choice. Getting the buttons to respond correctly took some trial and error. It also took a bit of problem-solving to make the drawings appear and disappear at the right time

In this section, I set up the canvas and displayed the main question, “Do you love me?” near the top. I used background()to give the sketch a soft pink color and text() to show the question. Then I created a green rectangle using rect() to represent the “Yes” button, and placed the text “Yes” inside it. This sets up the first option for when I click and interact with later in the code.
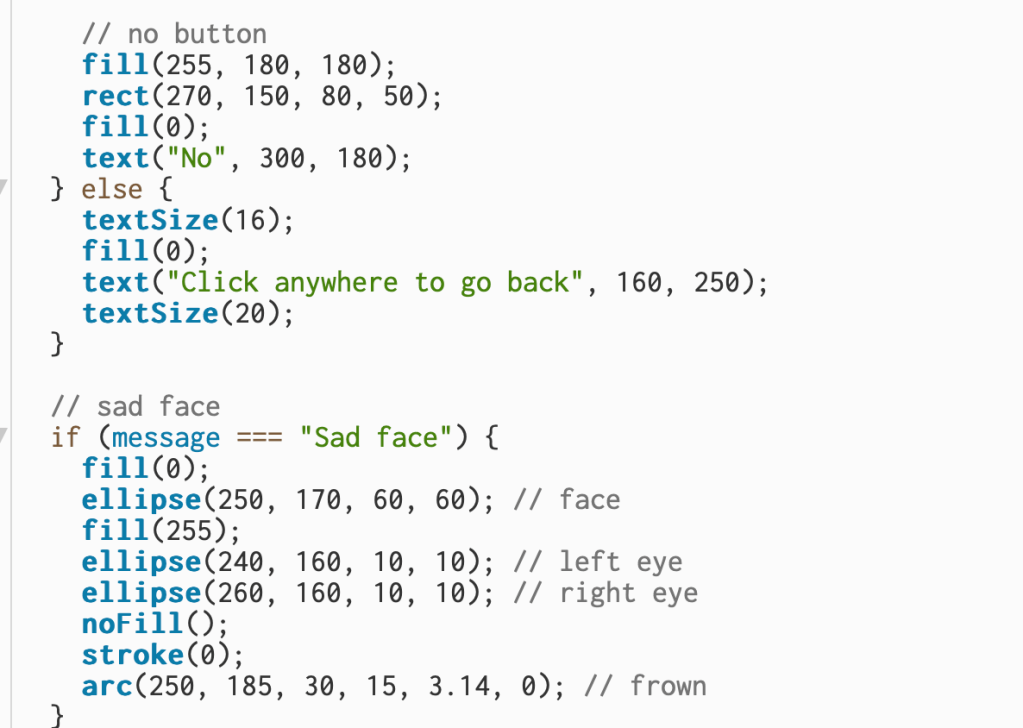
I added the “No” button so the user has a second choice. The button is a red rectangle with the text “No” on top, giving a clear visual contrast to the “Yes” option. Below that, I included a message that appears only after the I make the choice, saying myself or who is playing can click anywhere to go back. I used simple shapes like ellipse() and arc() to draw a sad face, two white circles for the eyes and a curved line for the frown – which appears when I click “No.”
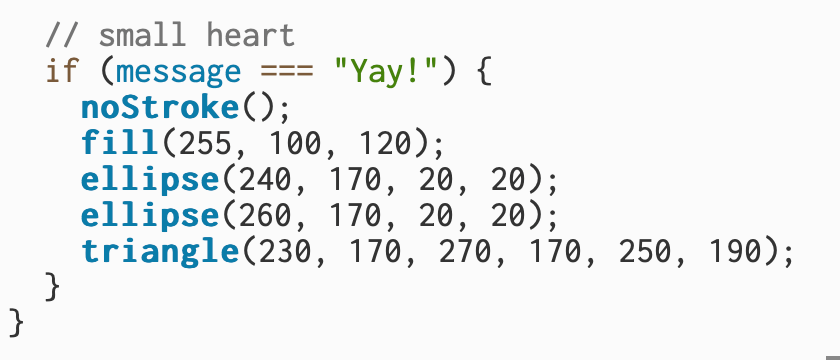
In this part of the code, I created a small heart that appears when I click “Yes.” I used two circles (ellipse()) for the rounded top sections of the heart and a triangle underneath to form the pointed bottom. This was an improvement from Week 2. The shapes are filled with a bright red-pink color to make the heart stand out, and noStroke() removes the outline so it looks smooth and unified.
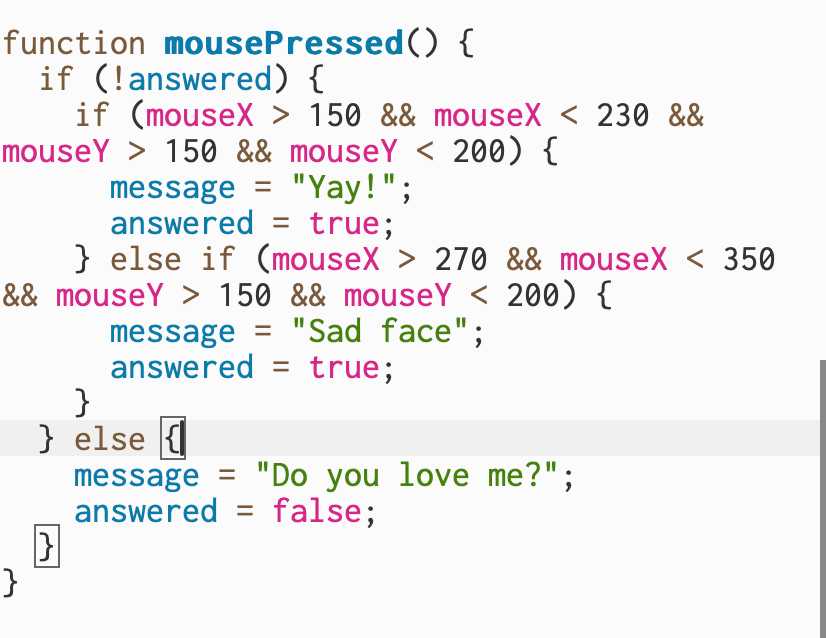
This section controls how the sketch reacts when I click the mouse. The first part checks whether the question has already been answered. If it hasn’t, it uses the mouse’s X and Y position to see if I clicked inside the “Yes” or “No” button areas, changing the message to either “Yay!” or “Sad face.” Once an answer is selected, clicking anywhere again resets the sketch back to the original question, allowing myself to play and choose again. https://editor.p5js.org/itsnandibby/sketches/1-egMnfMf
Original Sketch
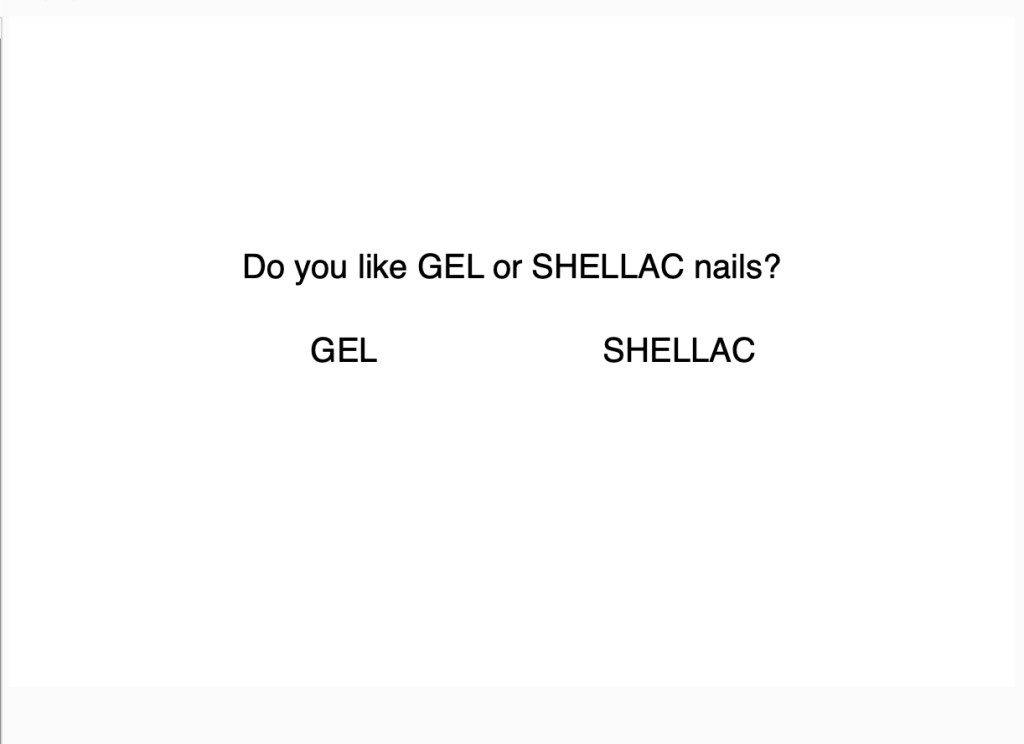
For this assignment, I wanted to keep it simple and tie it to something I actually like. I made my sketch ask a beauty question: Do you like gel or shellac nails? I set up my canvas in p5 and used conditionals to decide what text shows on the screen. At first, I just made it display the question and two options (GEL and SHELLAC). Then I used if and else if so that when a choice is picked, the text would switch to a new screen. That part made sense to me, it’s basically “if gel, show this; if shellac, show that.”
Where I got stuck is making the actual choice happen the way I imagined it. I wanted the user to be able to click on GEL or SHELLAC, but I couldn’t figure out how to code that part. Right now the options just sit on the screen as static text. I know it has something to do with checking the mouse position and then using conditionals again, but I wasn’t sure how to connect those pieces.
So at this stage, my sketch looks clean and the logic works in theory, but it’s not fully interactive. I’m happy that I at least understand how to set up the conditionals, and my next step will be to figure out how to make the text clickable instead of just stuck on the screen.
Which choices are easier, harder? Which choices are false choices?
In my sketch, picking gel or shellac is a pretty easy choice because it’s just based on personal preference. I wouldn’t really call either of them “hard” in this version. If I expanded it, I could make one option look good but secretly lead to something random, which would make it a false choice.
What internal or external factors influence the choice? How do others’ choices affect your choices?
Internal factors would be what I already like or what I normally get when I do my nails. External factors could be what my friends get, what’s trending, or even how much time I have. If I see someone else’s choice, that might make me curious to try it too, even if it wasn’t my first pick.
What choices surprise you with unexpected outcomes?
Right now my program doesn’t really have a surprise, but I thought about making one option seem like the “fancy” choice, but then the result would just be boring or silly. That way the outcome doesn’t match what the person expects.
Can you combine choices to create hard-to-predict results?
I didn’t get this far, but I think you could. For example, if the user picked gel and clicked the mouse, it could lead to one path, but if they picked shellac or pressed a key, it could go somewhere else. Using && and || could make the outcome less predictable because it would depend on more than one choice.
See here
9.16.25
Updated Sketch + Documentation


Here is another redo of the second assignment where I ditched the fish and attempted to create a simple beating heart. I did struggle to curve out the heart shape using only basic shapes, so I built it from two circles and a triangle to give it that rounded form. The heart stays in the center as a static element, while its size slightly changes over time to show the “beat.”
Here, I used frameCount to make the heart look like it’s beating. The line let size = 50 + (frameCount % 30)changes the heart’s size over time by adding a value that increases from 0 to 30 as the frames progress. Once it reaches 30, it loops back to 0, creating a simple growing and shrinking effect that mimics a pulse.
In this section, I set the static center position of the heart using width / 2 and height / 2, which kept it in the middle of the canvas. To create the heart shape, I combined two circles drawn with ellipse() for the rounded top parts and a triangle() underneath for the pointed bottom.
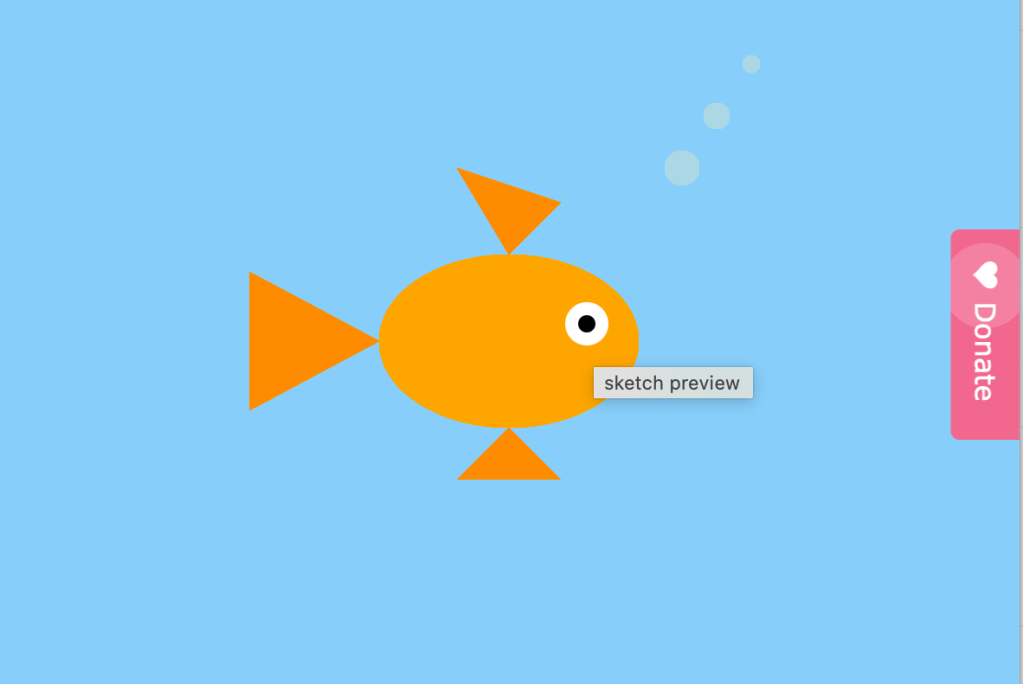
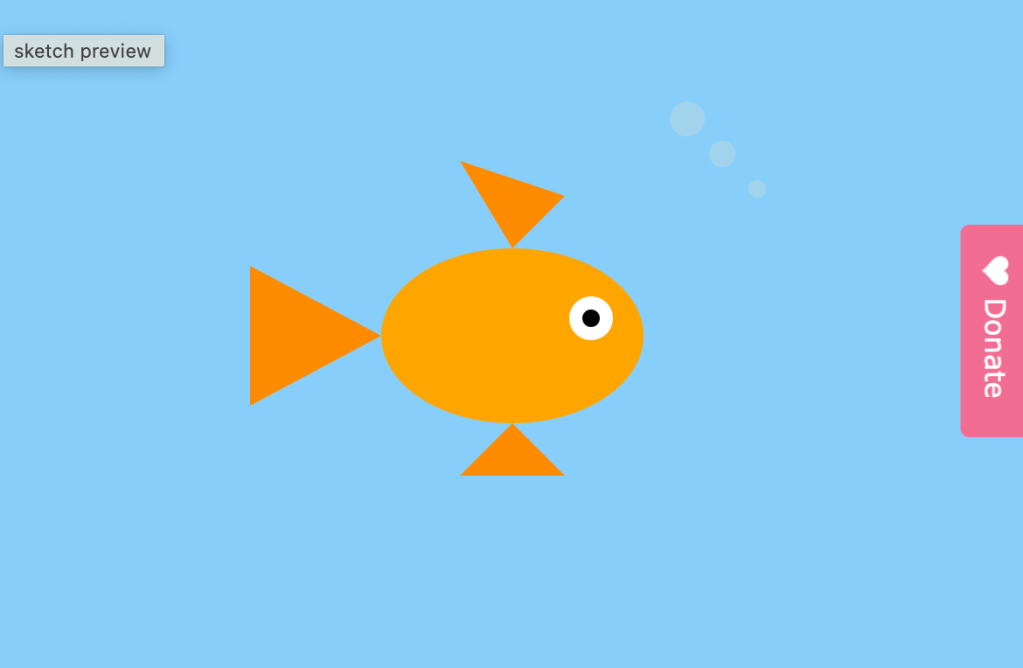
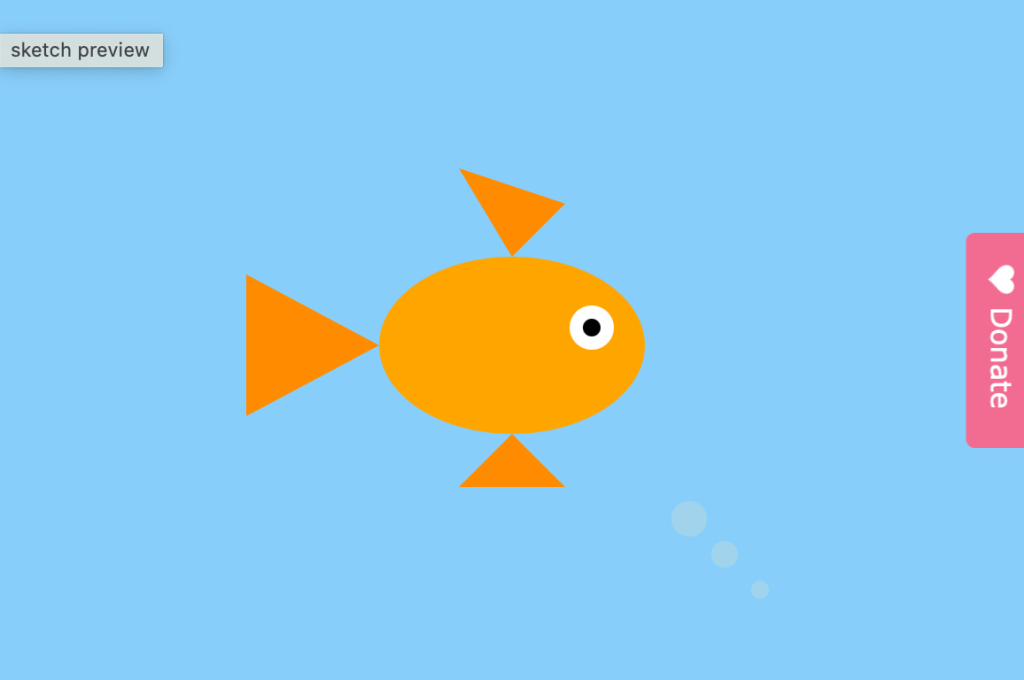
I am building on the goldfish sketch and started small by making the bubbles move. I was not encouraged to build a full aquarium, so I kept the design simple and focused on showing the difference between static and variable elements. The goldfish remains static while the bubbles rise and reset, creating motion. I did not want to complicate the process at this stage, but in the future I would like to add more fish and experiment with additional static and variable elements.
Original Sketch
Here are a few of my notes below –
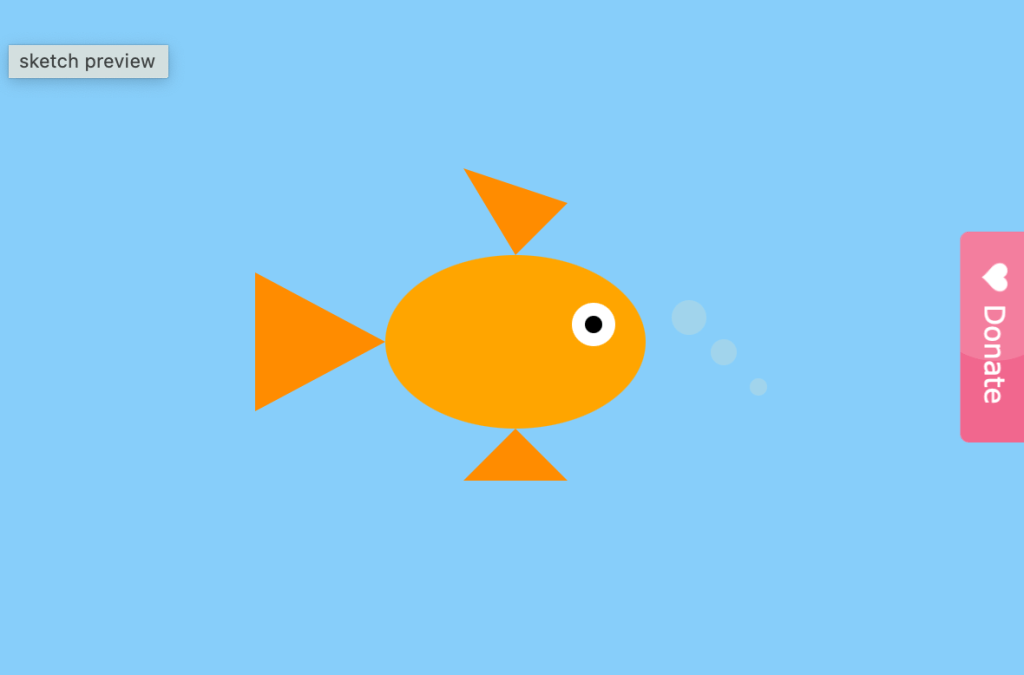
I started by drawing the goldfish using basic p5 shapes (ellipses and triangles).
I picked an orange color for the body and fins, and added a simple white and black circle for the eye.
To add detail, I drew three bubbles near the fish using ellipses.
At first, the bubbles were static (they didn’t move).
To make my sketch have both a static element and a variable element, I introduced variables to control the bubble positions.
I made the y-values of the bubbles decrease a little bit every frame so they look like they’re rising.
When a bubble moves off the top of the canvas, I reset its y-value back to the bottom so it can rise again.
The fish stays still (static), while the bubbles rise (variable).
9.9.15
Updated Sketch + Documentation
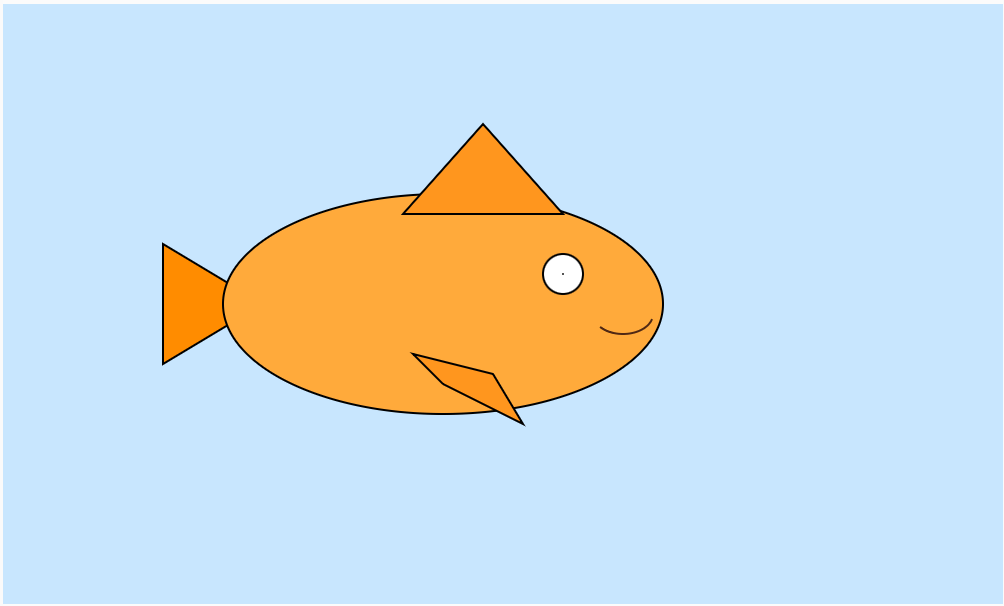
After emailing with my professor Sam, I decided to take a week to redo my first homework assignments as we were approaching midterms. For this revision, I wanted to focus on simplifying my process and making sure I only used the tools we’ve learned so far in class. Here you can see my second attempt at the goldfish – a cleaner version that uses only basic 2D shapes, color functions, and layering to build the image.
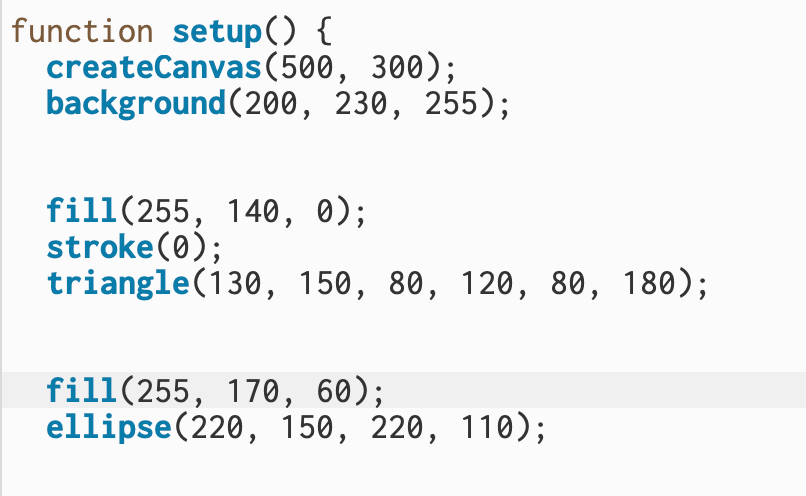
In this section, I set up the main part of my goldfish. I started by using fill(255, 140, 0) and triangle() to draw the tail, giving it a bright orange color with a black outline using stroke(0). Then, I added the fish’s main body with an ellipse() in a lighter orange shade so it stood out against the tail and created a smooth, rounded shape.
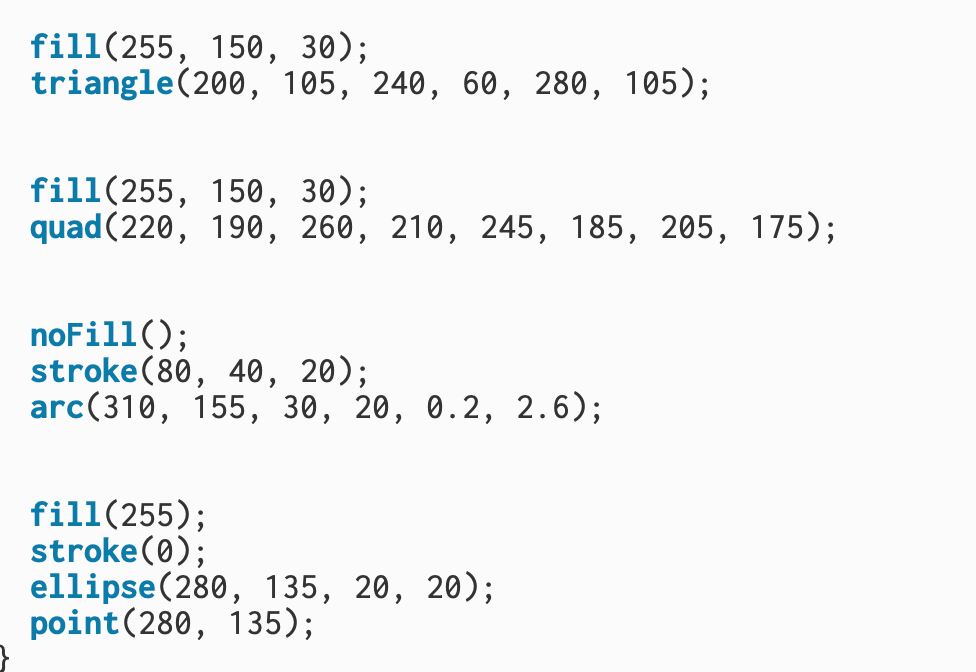
Next, I used triangle() to create the top fin and quad() for the bottom fin, both filled with the same orange tone to match the body. To give the fish expression, I used arc() with noFill() and a brown stroke() to draw a small curved mouth. I created the eye using a white ellipse() for the eyeball and a single point() in the center for the pupil.
Original Sketch
How computation applies to my interests
I’ve always been drawn to content creation, digital media, and editorial work, which I believe are externally beautiful forms of storytelling. But being in this program is pushing me to also look inward—at the structures and coding that make these creations possible. I’m interested in exploring how computation underpins the media I love, and how understanding those systems can help me not just create content, but also curate new tools or platforms that make the process easier, more accessible, and more impactful.
Sketch Documentation Notes
My sketch is of a goldfish. I chose to start here because it reminded me of being a kid and having a big aquarium filled with all kinds of fish. At first, I thought about drawing something a little flashier, like a betta fish, or even building out a whole aquarium scene. But I decided to keep it simple and start with a classic goldfish – something familiar and meaningful to me.
What pitfalls did you run into? What could you not figure out how to do? How was the experience of using the web editor? Did you post any issues to github?
At first, I honestly didn’t know where to start, and even something as simple as setting up the sketch felt overwhelming. I had to rely on tutorials for almost everything in the beginning, especially for small details like how to set up the canvas or make shapes interact. Once I got the hang of it, though, the web editor felt straightforward, and with some trial and error I became more comfortable experimenting with my sketches. I didn’t end up posting any issues to GitHub since most of my questions were answered through tutorials and practice, but overall, even though it was confusing at first, I now feel like I have a solid basic understanding of P5 that I can build on moving forward.